The biggest change that has defined the look of Windows 11 is the all-new Start Menu. Whenever you tap on the Windows key on your keyboard, it will show you the apps and the recent files on the screen. Now, what if you don’t want to see the recent files on the Start menu screen? Or, if you want to remove certain files from the Start menu? Just go through this article and you can remove recent files from the Start menu in no time at all.
How to disable the recent items in the Start Menu?
You can easily remove the recent files section from the Start menu with a simple Settings tweak.
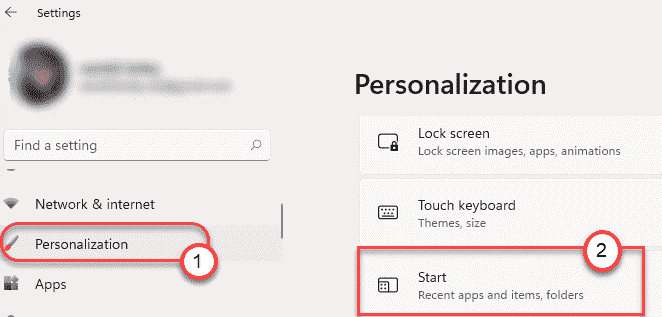
1. At first, press the Windows key+I keys together.
2. Then, click on the “Personalization” settings.
3. On the right-hand side, tap on the “Start” settings.

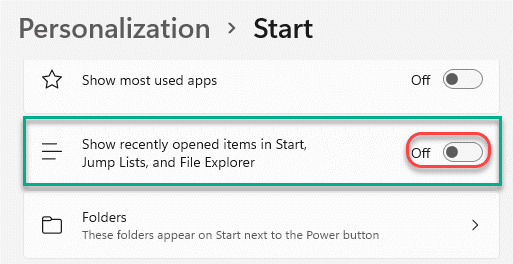
4. Then, on the same side, just toggle the “Show recently opened items in Start, Jump Lists, and File Explorer” settings to “Off“.

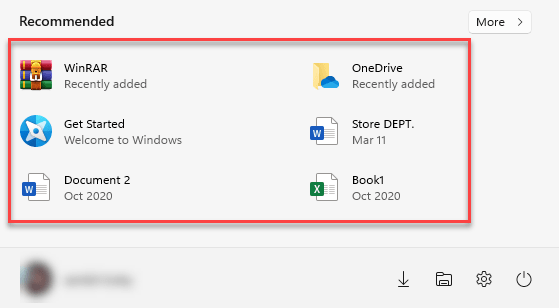
Just close the Settings window. Open the Start Menu and you will see the recommended files have appeared on the Start menu.

Show/hiDE additional folders on the Start
You can also toggle the additional folders from appearing or disappearing on the Start menu.
1. At first, open the Settings.
2. Then, go this way, just like before –
Personalization > Start
3. Now, scroll down and click on the “Folders“.

4. Next, toggle the ‘On‘ button beside the particular items you want in the Start menu.
5. Similarly, turn ‘Off’ those folders you don’t want to see on the Start menu.

Close the Settings.
The new Start Menu will appear like this on your Start menu –

HOW TO REMOVE YOUR IMPORTANT DOCUMENT IN RECOMMENDED
Now, what if you want to remove some specific folders or files from not appearing on the Start menu page? There is also a simple way to do that. This way, you can
1. Just tap on the Windows icon to open the Start menu.
2. On the Start menu, right-click on the particular item you want to remove and click on “Remove from list“.

Repeat the same feat for other items you don’t want on the Start Menu screen.
How to remove OneDrive files from the Start menu
Windows 11 integrates more online features than its previous version, putting the OneDrive files just two clicks away. You can find your OneDrive files from the Start menu. But, in case if you want to hide some particular private files, just follow these steps –
1. At first, click on the Start icon on the Taskbar.
2. To view additional OneDrive files, click on the “More>” on the left-hand side of the ‘Recommended‘ tab.

3. This will show you the list of OneDrive files.
4. Just, right-click on the particular file and click on the “Remove from list” to delete the item from the list.

This will remove the particular file from the Start menu.
That’s it! You can personalize your start menu as you prefer.