Sometimes, the quality of an audio file which was downloaded from the internet be it music or any speech, will be bit disturbed and you may find it little annoying to listen to it. So Audacity gives you a broad range of features to edit the audio file and make it a better audio file.
Some of the features used to enhance the audio quality in Audacity :
- Noise reduction – This almost cancels the background noise present.
- Compressor – It almost gets the higher peak points and lower peak points of sound decibels to an average point to make sound better.
- Filter Curve EQ – It is previously known as Equalization. You can increase or decrease the bass boost or treble boost etc. from the list given there.
- Normalize – This makes the sound quality by normalizing the high points and low points decibels.
In this article we will guide you through each step.
How to Boost the Audio Quality using Audacity
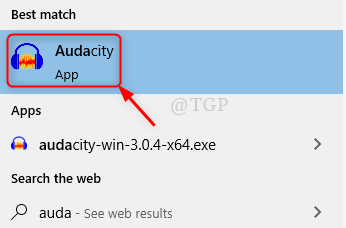
Step 1: Start the Audacity application by pressing win logo key and typing Audacity.
Hit Enter key.

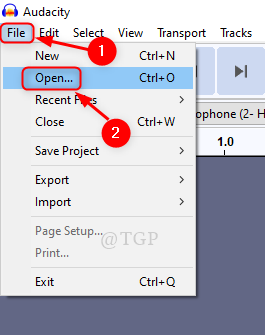
Step 2: Select the audio file which needs improvement.
Go to File and Click Open.

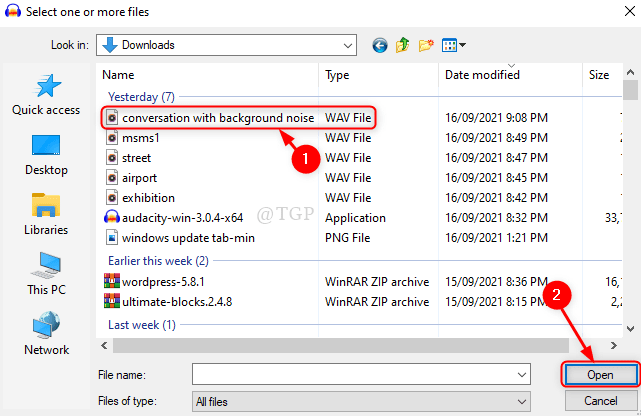
Step 3: Select the file by browsing through your system as shown.
Click Open.

Step 4: Noise Reduction
Select the whole audio file and go to Effect.
Click Noise Reduction.

Then, set the following:
- Noise reduction = 48
- Frequency smoothing = 0
- Sensitivity = 6
Then Click OK.

Step 5: COMPRESSOR
Go to Effect > Compressor.

In compressor window, let all the default values be as it is.
Click OK as shown below.

Step 6: Filter Curve EQ (Equalization)
Select the audio file and Click on Effect.
Then select Filter curve EQ from the list.

In the filter curve EQ window, Click on Manage at the bottom left side.
Go to Factory Presets > Bass Boost.

Then, at last Set the curve to 3dB and Click OK.

Step 7: Normalize
Click Effect and select Normalize

In the Normalize window, Keep all the default values as it is.
Then, Click OK.

Step 8: Finally, you can listen to the improved quality of the audio file by clicking Play button as shown below.

Note:- Preview button in most of the windows above, allows you to check the results before applying.
That’s all folks!
Hope this article was helpful and informative. Please leave us comments below.
Thanks for reading.