Although WiFi connections are visible and you chose to auto connect them or connect them after clicking on the icon in your windows PC. But, what if you want are unable to see the WiFi name in the list. This may happen due to several reasons such as you chose to forgot the network in past, or the SSID broadcast is off for the given network.
Whatever may be the reason, but in this case if you want to connect to the desired network, the best option is to connect to the network by adding the network manually by entering its name in settings. Here is how to do so.
How to Manually add a WiFi Network by Entering name in Windows 10
Step 1 – Open settings by clicking on windows start button in the taskbar and then clicking on Gear icon.

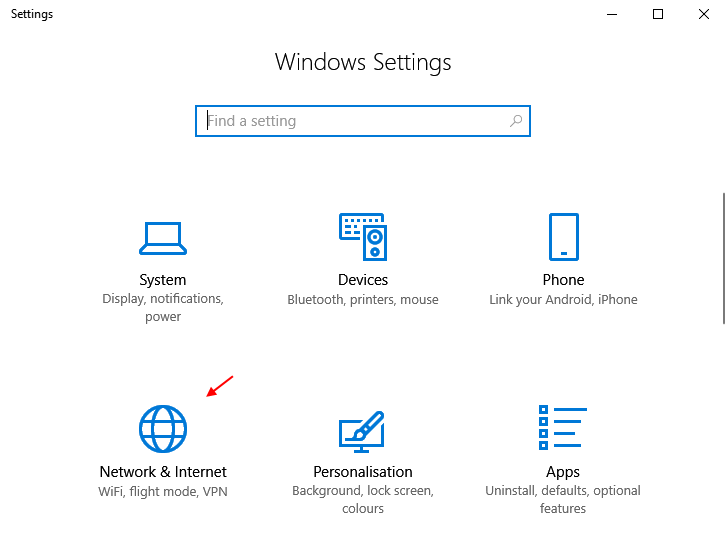
Step 2 – Now, click on Network & Internet.

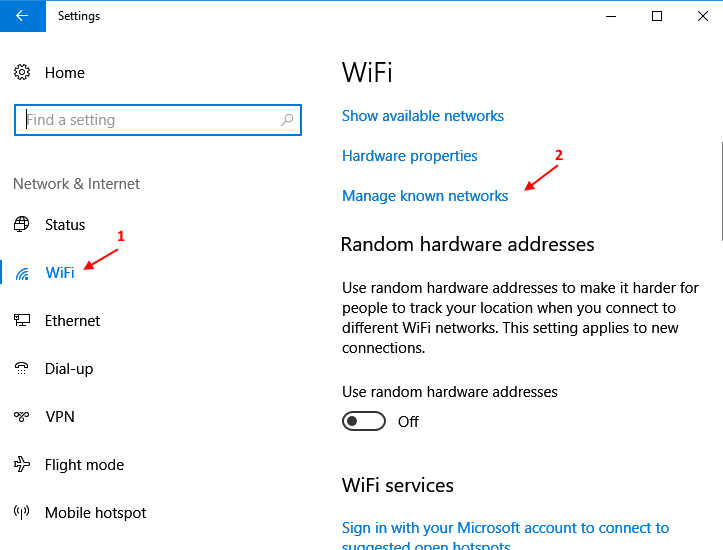
Step 3 – Now, Click on WiFi from the left menu.
Step 4 – Now, click on Manage known networks from the right side.

Step 5 – Now, Click on Add a new network.

Step 6 – Now, Enter the Name of the WiFi you want to connect in Network name field.
Step 7 – Now, click on save.

That’s it. You have added the WiFi network in the list. Now, click on the WiFi icon in the taskbar to open the list of all available WiFi networks.

Step 8 – Enter your WiFi password and you are good to go.