It has become increasingly common these days to see syncing issues with the Windows Mail Application. Syncing issues are seen even when the Fetch new Messages as they arrive and the Download messages from all time options are selected. This issue is mainly seen while syncing the Gmail and Yahoo accounts. Also, this issue is seen with few company emails.
In this article, we have listed some fixes that will help you solve the syncing issues with the Mail App.
Before Proceeding with the fixes, try the following :
- Ensure that the system has working internet connectivity.
- Check if you are able to send and receive emails from the web.
- Check if you can send/receive emails from another device ( phone, another laptop).
Fix 1: Update Windows Mail App
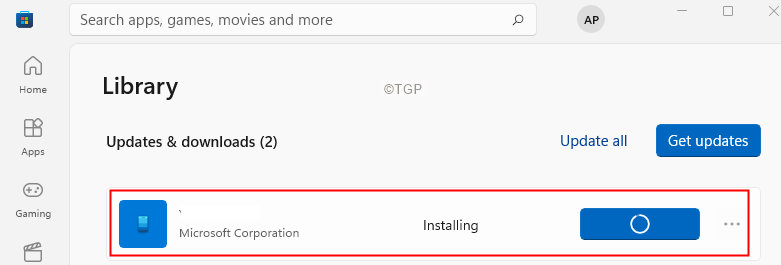
Step 1: From the taskbar click on the Windows Store App.
Step 2: From the left-hand side menu, click on the library
Step 3: Click on the Get Updates button next to Updates& downloads
Step 4: If there are any new updates Mail app you will be able to see them.
Step 5: Download and Install the updates.
Step 6: Restart your system.
Fix 2: Run the Windows Store Apps Troubleshooter
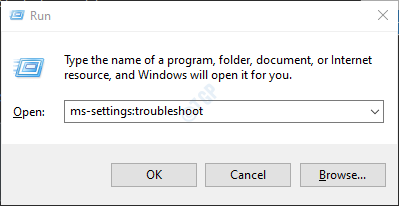
Step 1: Open the Run Dialog holding the Shortcut keys Windows+r
Step 2: In the appearing window, type the command ms-settings:troubleshoot and just click on OK

Step 3: In the appearing window, click on Other troubleshooter.
Step 4: Scroll down and locate Windows Store Apps under the Others section.
Step 5: Click on the Run button.
Step 6: The troubleshooter will start diagnosing the problem and you will be notified if there are issues. Also, the troubleshooter would recommend the required fix. Follow the on-screen instructions and complete the process.
Step 7: Restart the System.
Fix 3: Modify the Sync Frequency
Step 1: Open the Mail Application.
Step 2: On the left-most corner of the window, click on the menu option(three horizontal lines).
Step 3: Right-click on the account that has problems syncing.
Step 4: Choose Account Settings.
Step 5: In the appearing window, click on Options for syncing your content as shown below.
Step 6: In the Sync Settings window that opens, from the Download new content drop-down, select as items arrive.
NOTE: You can opt to choose other options as well. except based on my usage and manually.
Step 7: From the Download email from the drop-down, choose any time.
Step 8: Toggle the button next to the Email option.
Step 9: Click on Done.
Step 10: Restart the system.
Step 11: Open the Windows Mail application and check if the issue has been resolved.
Fix 4: Allow access to Calender
Step 1: Open the Run Dialog.
Step 2: Type the command ms-settings:privacy-calendar and hit Enter.
Step 3: Make sure Let the apps access your calendar option is turned on. If not, Toggle the button to turn it ON.
Step 4: Under this section, toggle the button next to Mail and Calendar to turn it ON.
Step 5: Restart the System.
Fix 5: Restore Firewalls to Default
Step 1: Open Run Dialog using Windows+R
Step 2: Type ms-settings:windowsdefender and hit Enter.
Step 3: In the appearing window, click on Open Windows Security.
Step 4: In the opening window, click on Firewall and network protection tile.
Step 5: Scroll down and click on Restore firewalls to default.
Fix 6: Remove and Re-add the account
Step 1: Open the Mail App.
Step 2: Click on the Settings icon from the bottom left corner of the window.
Step 3: From the window that shows up, select Manage Settings.
Step 4: Choose an Email account that needs to be removed.
Step 5: From the opening window, click on Delete account from this device.
Step 6: In the confirmation dialog that shows up, click on the Delete.
Step 7: Once that is done, click on Add account.
That’s All.
We hope this article has been informative. Thank you for Reading.
Kindly like this article if you have found this helpful. Also, comment and let us know the fix that helped you.
Stay tuned for more tips and tricks.


