Many users have started using VPNs these days to hide their IPs and online activities. This is especially useful if you constantly use public wifi. Also, when you want to access the content from other countries( TV series, movies) that are restricted otherwise you can use the VPN services.
Employees who are working from home can use the VPN to connect to the Company’s network. This way, they can look at the sensitive information on the company’s network from their devices even when they are away from home.
OpenVPN is a client that you have to install on your system to use the VPN services. Once you have the client installed, you can either use paid or free VPN services.
In this article, let’s see how to Install and configure Open VPN easily on Windows 11.
Steps to Download and Install Open VPN
1. Vist the OpenVPN community Downloads Page.
2. If your system is 32-bit, Choose the Windows 32-bit MSI installer. If your system is 64-bit, choose Windows 64-bit MSI installer.
3. This will start the download. Once the download is completed, double-click on the file to run the Installer.
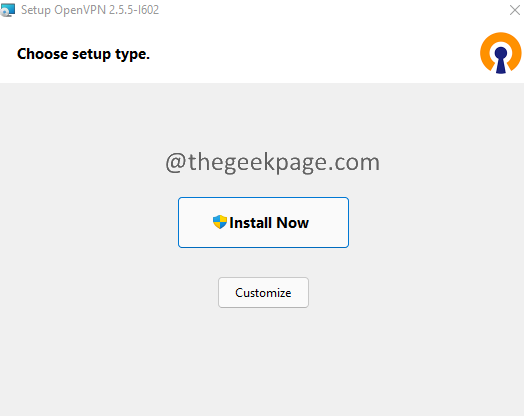
4. The installer window opens. Click on the Install Now button.
5. If you see a UAC window popping up asking for permissions, click on Yes.
6. Now the Installer will run and complete the Installation of OpenVPN on your system.
7. If the Installation is successful, you will be able to see an OpenVPN GUI shortcut Application on your Desktop as shown below.
8. You will also see an icon in the taskbar tray as shown below.
9. If you see an OpenVPN window saying No readable connection profiles found, click on OK.
This completes the installation of OpenVPN on your system. In the next section, let’s check how to configure and set up OpenVPN.
Steps to Configure Open VPN on your system.
VPN for Official Purposes:
If you are using a VPN for Official purposes, your company would have provided you with a config file. You just have to import it to the system. To import the file to the system, follow the below steps.
1. Right-click on the OpenVPN icon on the System Tray.
2. Choose Import.
3. Make an appropriate choice from the context menu and import the config file to OpenVPN.
4. Once the Import is successful, you will see the message File imported successfully.
5. Double-click on the OpenVPN icon in the task tray.
6. Enter the Username and Password given by your company and press Enter.
VPN for Personal Use:
If you’re using a VPN for your personal use, you can use any paid or free VPN service for the same. In this article, we will be using vpnbook.
1. Open VPN book’s free VPN service.
2. Under the Free OpenVPN section, you will see the bundles listed. When you scroll down till the end, you will notice the username and password. Make a note of it.
3. From the available bundles, choose any bundle of your choice.
4. You will notice that a zip file has been downloaded.
5. Now, right-click on the file and choose Extract All.
6. In the Extract Compressed Folders window, give a suitable location and click on Extract.
7. Once the extraction is complete, open the folder.
8. You will see many config files listed.
9. Now, right-click on the OpenVPN icon on the System Tray as shown in the below image.
10. Choose Import.
11. Choose Import file.
12. Now, browse to the location where you extracted the file(Refer steps 7,8,9)
13. Choose any one of the files and click on OK.
14. Once the file is imported, you will see the message File imported successfully.
15. Now, double-click on the OpenVPN icon in the task tray.
16. You will be prompted to enter the username and password.
17. Enter the Username and Password from Step 2.
18. Click on the OK button.
That’s all.
We hope this article has been informative. Kindly comment and let us know if this helped.
Thank you for reading.


