In today’s fast-paced technological world, one has to be aware of how to protect their work-related information from hackers and malicious viruses. Windows 10 has a security feature called ‘Firewall and network protection’ that protects your network system from hackers and viruses. It works as a defender against unauthorized software and systems to be installed or used in our device.
Certain applications or software are not allowed by the Firewall settings policy. If the users are installing such an application, then they manually allow in the firewall settings to make the application or software run into the device. Sometimes the user may make so many changes in the Firewall settings that it gives access to the network issues and problems in accessing and running some applications, printing, sharing files, emails or such work.
Have you detected the same problem in your Windows 10 device? Read this how-to article to restore your Firewall settings to default in Windows 10 device, so that the user can work with the network system more promptly.
Methods to restore Firewall settings to default
You can restore or reset the windows firewall settings to defaults by using any of the four methods.
Method 1. Restore the Windows Firewall settings to defaults by using Control Panel
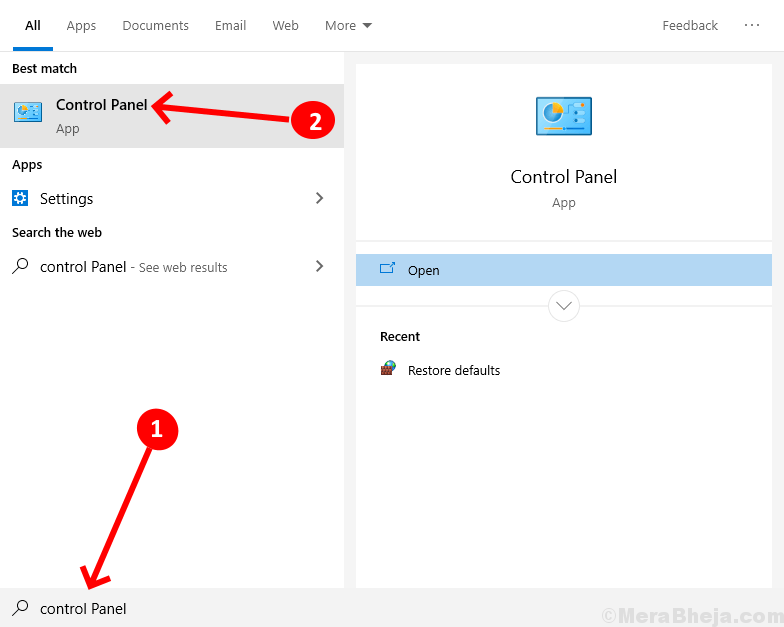
Step 1. Search for Control Panel in the Windows search box and open it. 
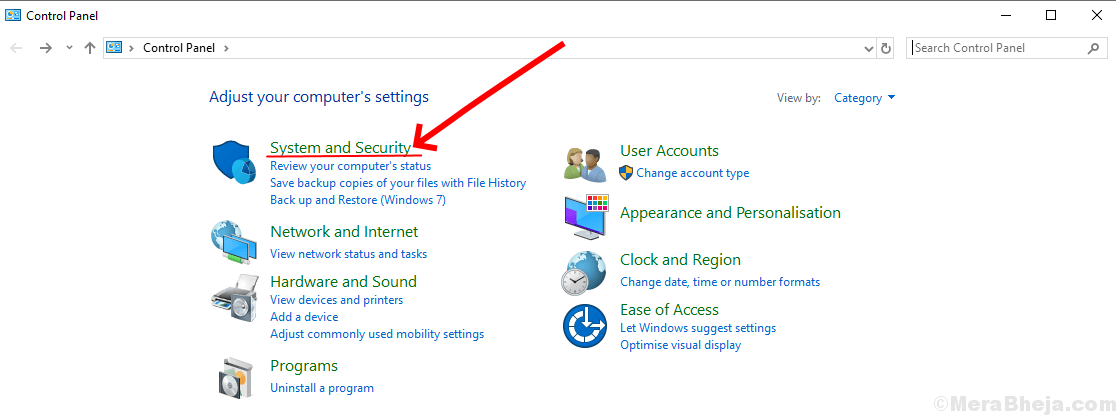
Step 2. Click on System and Security from the control panel menu.

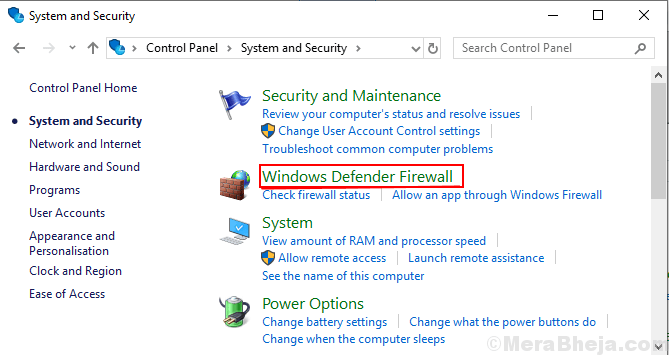
step 3. Now in the right menu, click on Windows Firewall Defender.

Step 4. In the left menu, click on ‘Restore Defaults Option’.

Step 5. Now a dialogue box will appear that will display what changes will be made after restoring. Click ‘Yes’ to continue for restoring the firewall settings to default. You will be asked to reconfirm for resetting.

Method 2.Restore the Windows Firewall settings to defaults using Windows settings
Step 1. Go to settings from the windows menu.

Step 2. Scroll down and open the ‘Update and Security’ option from the settings menu.

Step 3. From the left menu, click on the ‘Windows Security’ option and then in the right menu, click on the ‘Firewall and Network Protection’ option.

Step 4. Now another box will appear on your screen on which you have to click on ‘Restore Firewall to Default’.

Step 5. You will be asked to confirm for restoring. Click ‘Yes’ and the firewall settings will be restored to default.

Method 3.Restore the Windows Firewall settings to defaults using command prompt
Step 1. First of all search for Command prompt and then right-click on the app and tap on ‘run as administrator’.

Step 2. Now you will see a box, type this command: netsh advfirewall reset.

Step 3. Click the enter button on the keyboard and your firewall settings will be restored to default.
Method 4.Restore the Windows Firewall settings to defaults using PowerShell
Step 1. Search for PowerShell in the search box and then right-click on the app and tap on ‘run as administrator’.

Step 2. Then a box will appear in which type the command:
(New-Object-ComObject HNetCfg.FwPolicy2).RestoreLocalFirewallDefaults()

Step 3. Press the enter button on the keyboard and set aside for a while to let the windows restore the settings to default