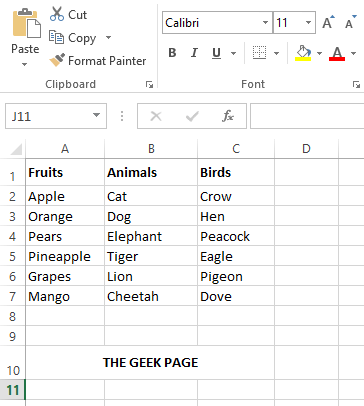
So you prepared a huge excel sheet so full of numbers and decimals and whatnot. You are all ready to print the document and be done with the day’s work. You hit the keys CTRL + P to preview your print and that’s when you notice gridlines are not coming in the preview, and it’s all just numbers. Well, nothing else can make your heart skip a beat than this one right here.
In this article, we explain how you can easily print the gridlines, row headings, and column headings of your Excel document with some simple steps.
Solution
Step 1: Launch Microsoft Excel and open the file that you want to print.
Once the file is opened, press the keys CTRL + P together to open the Print settings.
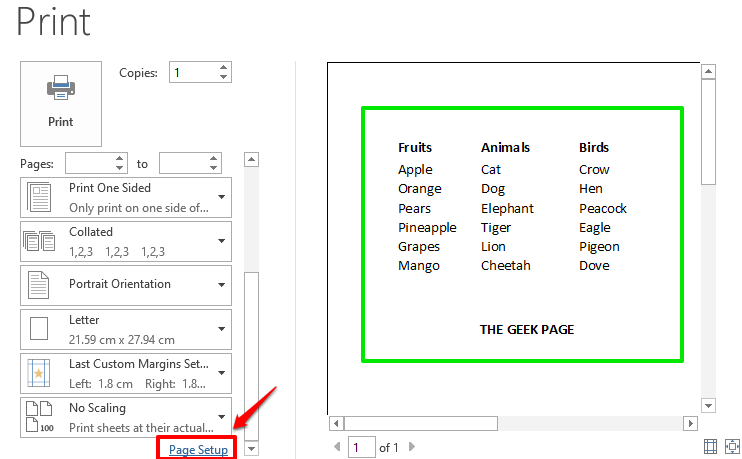
Step 2: When the Print settings open up, you will be able to see in the print preview section that gridlines, row headings are column headings are not visible. Don’t worry, let’s change that.
For that, click on the link Page Setup on the left side of the window as shown in the screenshot below.
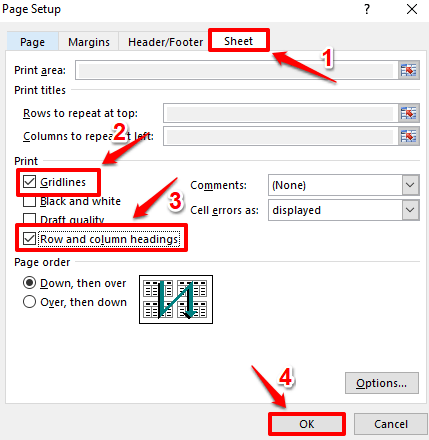
Step 3: In the Page Setup window, click on the tab named Sheet.
If you want the gridlines to be printed, check the checkbox corresponding to the option Gridlines.
Also, if you want the row and column headings to be printed, check the checkbox corresponding to Row and column headings.
Once you are all done, hit the OK button at the bottom.
Step 4: If you now look at your print preview, you can see that gridlines, row headings, and column headings are now visible. You can now go ahead with pressing the Print button to print the page.
Hope you found the article useful. Please do come back for more tips, tricks, and how-tos.


