Moving a row in a table in an Excel file might be an easy task for you. But what about Microsoft Word? Let’s say you have a row or a set of rows in a table in a Microsoft Word document. You want to move the entire row(s) up or down. The simplest way would be to use some keys on the keyboard. Yes, you heard it right. You can accomplish this task just with the help of some keys on your keyboard.
Read on, to learn how you can easily move rows up or down in a Microsoft Word Table.
Solution
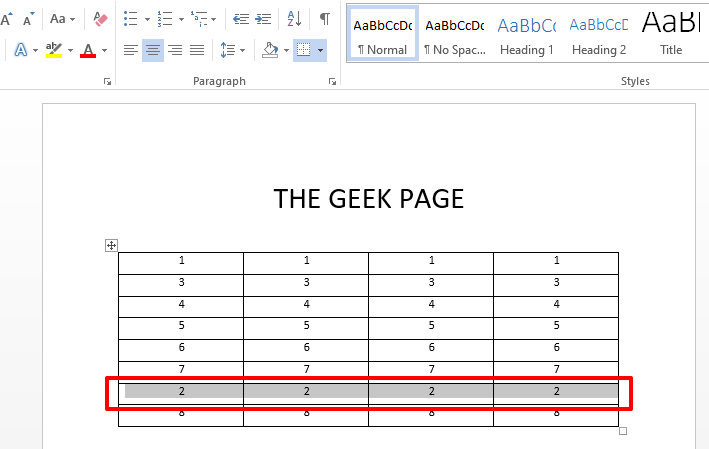
Step 1: In the table shown in the screenshot below, I have a row for each number from 1 to 8. The row for 2 is, however, in the wrong position and it needs to be moved up. For that, firstly, either select the entire row of 2 or click anywhere on the row for 2. In the example below, I have selected the entire row, but I can simply just click on anywhere on the row as well, instead.
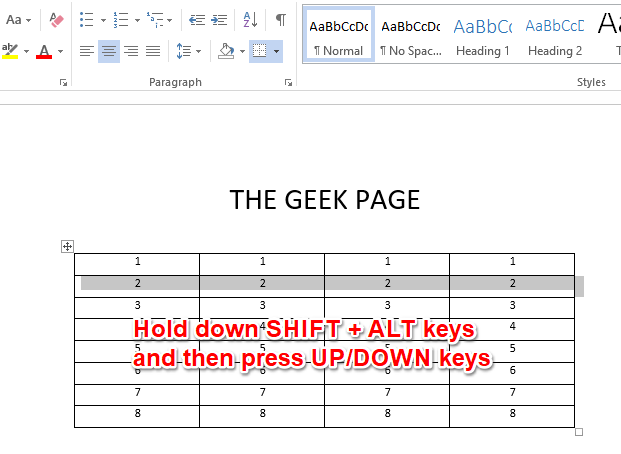
Step 2: Once you have selected the row, simply hold down the SHIFT + ALT keys together. Now, if you want the row to be moved up, press the UP arrow in your keyboard. If you want the row to be moved down, press the DOWN arrow on the keyboard. This would move the entire row up or down.
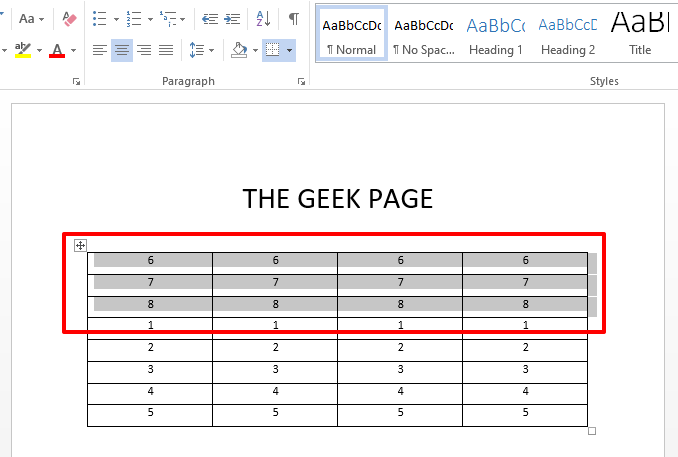
Step 3: You can also move an entire block of rows using the same trick. You just need to select the entire block of rows in that case. Once the block of rows is selected, simply hold down the SHIFT + ALT keys and then press the UP or DOWN arrows just like how it was done in the step above to move the entire block up or down. That’s it.
Please tell us in the comments section whether you found the article useful.


