Video RAM (VRAM) is basically not like main RAM you have got on your system. This VRAM actually transfers the image data digitally to the Display screen via HDMI or Digital Video Interface. Initially, the image data is been processed by the processor and stored in the main RAM. Later, it is retrieved by the VRAM and sent to the display to maintain a constant display resolution. The more the VRAM capacity, the more would be the display quality. Therefore, if you want to play some good quality video games on your system, then you probably would need the more VRAM for a great display. There are a lot of companies that offer graphics card which will boost the display appearance for a greater experience. So if you want to know how much VRAM you have got on your system, then please go through few simple steps mentioned below in this post.
Steps to follow to Check Video RAM Capacity on Windows 11 PC
Step 1: Press Windows + I keys together on your keyboard to open Settings window.
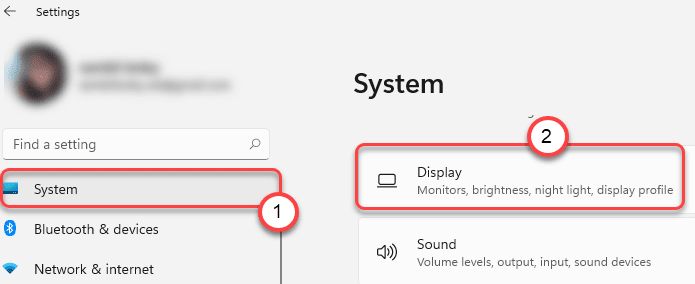
Step 2: Click System on the left menu of the Settings window.
Step 3: Then, Select Display option from the list shown on the right side of the window.

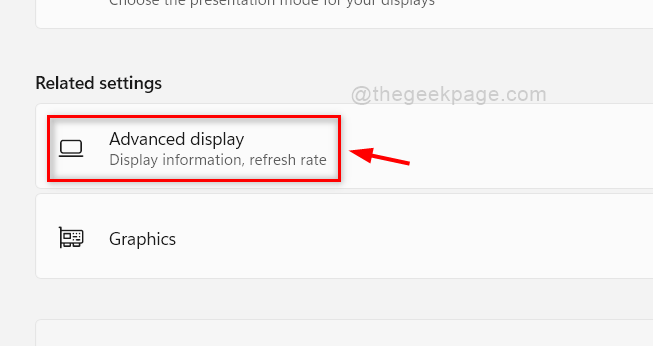
Step 4: Scroll down the display page and click Advanced display option under Related settings at the bottom as shown below.

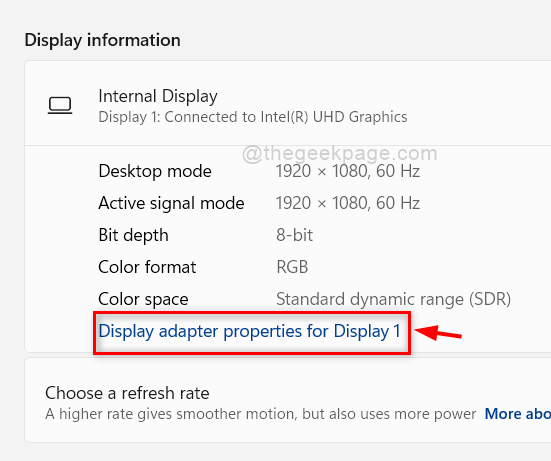
Step 5: Then, Click Display adapter properties for Display1 option under Display information section as shown below.

Step 6: Make sure you are in the Adapter tab of Properties window.
Step 7: Then, Check Dedicated Video Memory for its value which is given in Megabytes.
Step 8: At last, Click OK button to close the properties window.

Step 9: Close the Settings window.
That’s it folks!
I hope this article was useful to you.
Please leave us comments below. Thank you.