When working with the excel sheet for organizing the data such as employees’ records or shopping carts, or so on, you also might need to add the excel sheet file path or location. You can get the excel sheet path location manually by going to the folder where the file is present and then, going to its properties window and getting the path location.
But there is a simple way to get the file path from inside the excel app. You can also add it as a quick access toolbar on your address bar in the excel app. If you want to know how this can be done quickly and easily, this article will guide you.
How to Get The File Path of Excel Sheet Easily
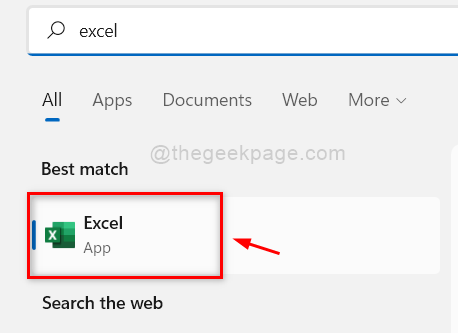
Step 1: Firstly, you need to open the Excel app on your system by pressing the Windows key and typing excel and then, hitting the Enter key on your keyboard.

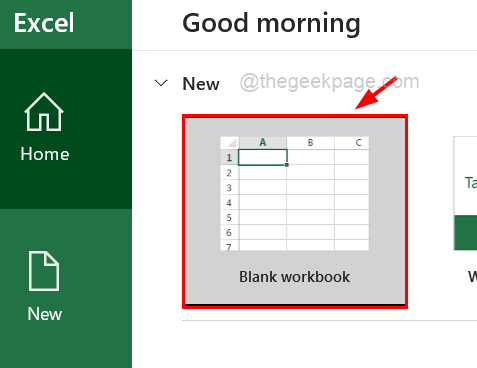
Step 2: Once the Excel app opens, click Blank Worksheet or any saved excel file from your computer.

Step 3: After the excel file sheet gets opened, draft the blank worksheet and make sure it is been saved on your computer. If not, please press CTRL + S keys together and save the file. Otherwise, you will not be able to get the file path.
Step 4: After you made sure the excel sheet is saved, go to the File option on the top menu bar.

Step 5: Next, click Info on the left side and then, you need to click the Copy path option on the right side.

Step 6: If you want to open the folder where this excel sheet is saved, just click Open file location.

Step 7: Come back to the excel sheet and paste it into any cell in any sheet that you want.
Step 8: If you want to add the file path/document location in the quick access toolbar, first you need to open the Options window.
Step 9: To do so, first click on the File on top and then click Options at the bottom on the left side as shown below.


Step 10: Now the Options window opens up and you need to select the Quick Access Toolbar option from the left panel menu as shown below.
Step 11: Then on the right side, select the All commands option from the list of Choose commands from.

Step 12: Next, scroll down the list below and find the Address (Document location).
NOTE: If you are using MS Office below 2019, then you might find just the Document location option in the list instead of the Address (Document location).
Step 13: Either double click on the Address (Document location) to add it or just select it and click on Add button as shown in the below screenshot.

Step 14: Next, make sure you have checked the Show Quick Access Toolbar below the Ribbon checkbox and tap on OK.

Step 15: Once it is done, you can see that the Quick Access Toolbar is below the Ribbon and you may find the excel sheet file path in it as shown below.
