Windows 11 system was launched by Microsoft with many features and options those are convenient to all the people including those with cognitive disability also and one of those features is nothing but themes. There are themes available for windows, keyboard, etc. and those are not only limited to light and dark mode theme. You can explore many more themes that exist on your laptop and windows allows users to change the theme of virtual keyboard according to their wish. In this article, we are going to guide you on how to change the virtual keyboard theme on your windows 11 PC
How to Change Virtual Keyboard Theme on your Windows 11 PC
Step 1: Press Windows + I keys together on your keyboard to open Settings app.
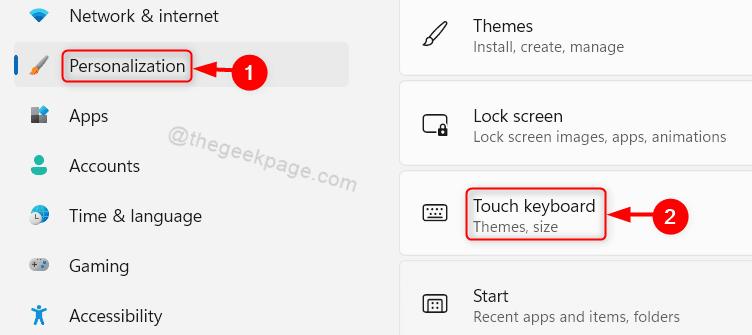
Step 2: Then, go to Personalization on the left side of the settings app window.
Step 3: Scroll down the page and click on Touch keyboard on the right side of the window as shown in the below screenshot.

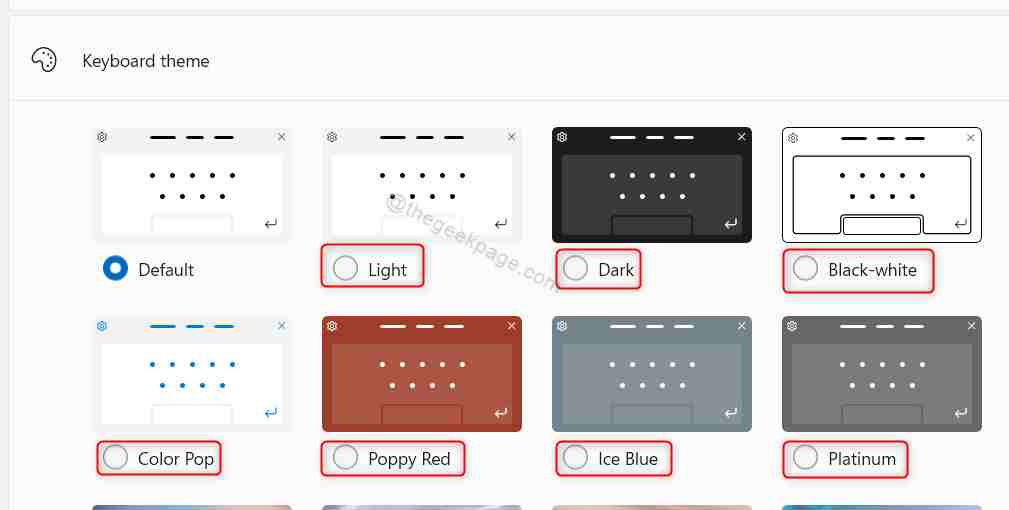
Step 4: Under Keyboard theme section, you can choose from the variety of options available as shown below.

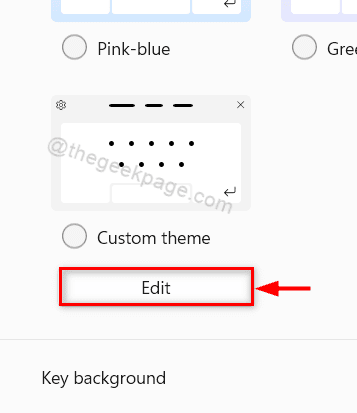
Step 5: You can even create a custom theme by clicking on Edit under Custom Theme as shown in the below image.

Step 6: Click on each tab i.e., Text, Keys and Window & select the colors you want and finally click on Save button at the bottom as shown below.

Step 7: To check if the changes made by you have reflected or not, Click on Open keyboard button in the View your changes option.

This way you can change the current virtual keyboard theme and also can create custom theme for your virtual keyboard on your system.
That’s all guys.
Hope this article was informative and helpful. Please leave us comments below.
Thanks!