If you are trying to access a WiFi network from your device, but your WiFi network is not showing up in the available networks list and you are trying to find a solution for your problem- you are in the right place. Generally, the manual startup of the necessary network services is the reason for this problem. Follow these easy solutions to fix your problem. But before going ahead, don’t forget to attempt these workarounds which cover some simple few tricks/fixes.
Initial Workarounds–
1. Check if you can access the WiFi network from another device.
2. Restart your WiFi manually. Don’t forget to check if the issue is fixed.
3. Reboot your computer. Check if the problem is fixed.
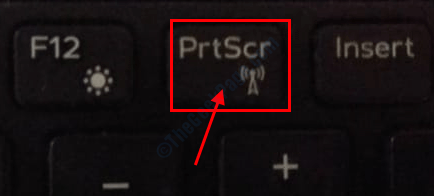
4. Try to access the WiFi network from the keyboard. Press Fn+ the key WiFi assigned to on your keyboard (Ex- Fn+PrtScr on our computer) and check if you can access your network.

Even after attempting these initial workarounds, still, you are unable to see the WiFi network, attempt these fixes-
Fix-1 Disable and Enable your WiFi network-
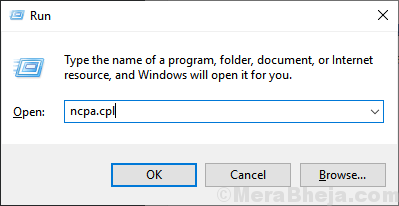
1. To open the Network Connections window, first, you need to open the Run window. To do so, press Windows key+R.
2. In that Run window, type “ncpa.cpl” and then click on “OK“.

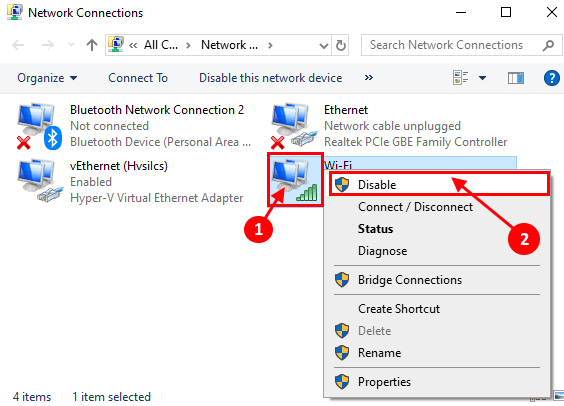
3. Right-click on the WiFi network you and click on “Disable“.

4. Now, wait for a while, and then again right-click on the disabled WiFi network, and then click on the “Enable“.

Check if you can see and connect with the WiFi network. But, if you can not connect to the network, go for the next fix.
Fix 2 – Reset Network via cmd
1 – Search cmd in windows search and right click and choose run as admin

2 – Now, run the command given below and hit enter key
netsh winsock reset
3 – Now, run the command given below and hit enter key
netsh int ip reset resetlog.txt
3 – Close the cmd window and Restart PC
Fix-3 Automate necessary services
1. Pressing Windows key and ‘R‘ key will pop up the Run window.
2. In that Run window, write “services.msc” and then click on “OK“.
Services window will open.

3. Now, double click on “WLAN AutoConfig” to open its Properties.

3. Check if the “Startup type:” set to “Automatic“. (If not, then click on the drop-down of “Startup type:” and set it to “Automatic“).
4. Also, check if the “Service status:” is “Running” or not.
If you see, the Service status is “Stopped” then click on “Start” to start the process.
5. Now, click on “Apply” and then on “OK” to save the changes.

You should be able to able to see and connect to the WiFi network.
Fix-4 Disable Microsoft WiFi Direct Virtual adapter-
1. Open the Device Manager following the methods discussed before.
(Press ‘Windows key+R‘ and type “devmgmt.msc” and press “Enter“.)

2. Now, in the menu bar of Device Manager window, click on “View” and then click on “Show hidden devices“.

3. Now, in the list of the devices, expand “Network adapter” and find “Microsoft Wi-Fi Direct Virtual Adapter” and right-click on it.
4. Now, click on the “Disable device” to disable it.

Reboot your computer and after rebooting check if you can find the WiFi network on your device.
Fix-5 Uninstall and Reinstalling WiFi driver
Follow these steps to uninstall the WiFi driver-
1. You have to open an elevated window by pressing the Windows key and ‘X‘ key together.
2. Then, click on the “Device Manager“.

3. In the Device Manager utility window, expand the “Network Adapter” drivers list.
4. Then, right-click on the WiFi driver you are using, click on “Uninstall device“.

Close the Device Manager window.
Follow these below-mentioned methods to install the driver automatically-
Process 1-
Once you have closed the Device Manager window, restart your device.
Method 2–
If rebooting your computer didn’t install the driver then you have to install the driver yourself. Follow to install the driver manually-
1. At first, you have to open the Device Manager window.
2. Then, click on the “Action” on the menu-bar and then click on “Scan for hardware changes“.

Check if you can access the WiFi network.
Fix-6 Troubleshoot network problems-
1. Press Windows key+S and type “troubleshoot network” in the search box beside the Windows icon.
2. click on “Troubleshoot network“.

3. Now, on the left side of the Settings window, click on “Internet Connections“,
4. Then, click on “Run the troubleshooter“.

5. Now, follow on-screen instructions and it will automatically attempt fixes for your problem.
6. When the process is complete click on “Close“.

Try to find and connect to the WiFi network.
If you can not connect to the network, you can troubleshoot an adapter for problems.
7. Scroll down to find, click on “Network Adapter” and click on the “Run the troubleshooter“.

Wait for a while, till the Troubleshooter attempts a fix for your problem. Close the Troubleshooter window.
Reboot your computer and check if you can connect with the WiFi network. Your problem should be solved.
Fix-7 Update the WiFi network driver-
1. Press Windows key+S. Now, type “devmgmt“.
2. Then, click on the “Device Manager” in the search results.

Device Manager window will open.
3. In the Device Manager window, find “Network Adapters“. Expand by clicking on it.
4. Simply right-click on the network driver you are using and click on “Update driver“.

5. After that, select the option “Search automatically for updated driver software“.

Once Windows updated your graphics driver, close the Device Manager window.
Then, reboot your computer.
Check if you can see and connect to the network.
Fix-8 Delete Wlansvc service files-
1. Right-click on the Windows icon and click on “Search“.
2. Now, type “services“. Once you see the ‘Services‘ has appeared in the search result, click on it.
Services window will open.

3. Scroll down to find the “WLAN AutoConfig” service and right-click on it, and then click on “Stop” to stop the service.

Minimize the Services window.
4. Now, press Windows key+R to launch Run, and then copy-paste this address in Run window.
C:\ProgramData\Microsoft\Wlansvc\

5. Now, in the Wlansvc window, delete any folder except the folder named “Profiles“.
5. After this, open the “Profiles” folder just by double-clicking on it.

6. Now, in the Profiles folder, delete any folder/files except the “Interfaces” folder.
7. Open the “Interfaces” folder.

8. Now, in the Interfaces folder, delete every file.

9. Now, open the Services window again.
10. In the Services window, scroll down and double click on “WLAN AutoConfig” to open its Properties.

11. Now, click on the drop-down menu beside the option”Startup type:” and select “Automatic“.
12. Then, Click on “Apply” and then on “Ok” to save it.

Close Services window.
Now, reboot your device.
After rebooting you should check if you can connect to the WiFi network or not.