The usual norm should be like when you connect to a domain network, for instance, of a company, the Windows Firewall should change to domain profile automatically. But, many times, the Windows Firewall can’t recognize the domain network in your Windows 10 PC or any changes in the network settings.
The reason behind this issue is mostly a 3rd party VPN (virtual private network) that creates irregularities in the network path. Fortunately, there is a way to fix this issue. Let’s see how.
Method 1: By Disabling NegativeCache in Registry
Before you proceed to make any changes to the registry editor, make sure that you create a backup of the registry data, so that in case you lose any data, you can restore it back.
Step 1: Go to the Start button your desktop and type Regedit in the search field.

Step 2: Left-click on the result to open the Registry Editor.

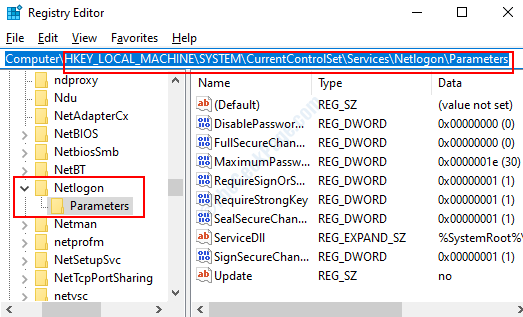
Step 3: In the Registry Editor window, navigate to the below path:
HKEY_LOCAL_MACHINE\SYSTEM\CurrentControlSet\Services\Netlogon\Parameters

Step 4: Now, on the right side of the window, on an empty space, right-click and select New from the right-click menu. Then select DWORD (32-bit) Value from the sub-menu.

Step 5: Now, right-click on the newly created DWORD (32-bit) Value and select Rename from the right-click menu.

Step 6: Now, rename the new DWORD Value as NegativeCachePeriod. Make sure that the value is set to 0.
To check, double-click on NegativeCachePeriod and in the Edit DWORD (32-bit) Value window that opens, make sure the value is set to 0 in the Value Data field.

Once, you are done, restart your PC and the issue should be resolved. But, if problem persists, follow the 2nd method.
Method 2: By Configuring the Dnscache Key in Registry
Step 1: Go to the Start button your desktop and type Regedit in the search field.

Step 2: Left-click on the result to open the Registry Editor.

Step 3: Now, copy the below path and paste it in the address bar of the Registry Editor Window:
HKEY_LOCAL_MACHINE\SYSTEM\CurrentControlSet\Services\Dnscache
Now, go to the right side of the pane, and right-click on an empty area. Click on New in the right-click menu and then select DWORD (32-bit) Value from the sub-menu.

Step 4: Now, right-click on the newly created DWORd (32-bit) Value and select Rename from the context menu.

Step 4: Now, rename the new DWORD Value as MaxNegativeCacheTtl and make sure that the value is set as 0.
To check, double-click on MaxNegativeCacheTtl to open the Edit DWORD (32-bit) Value dialogue box and go to the Value Data field to check if it’s set to 0.

That’s all. Your Windows Firewall should now connect to the domain network profile and you should not encounter this issue anymore.