If you feel like your audio quality is not good enough in your Windows 11 while watching movies or while listening to music, you can turn on the Enhance audio feature. This is a built-in feature that Windows has, but it is turned off by default. If you would like to turn on this feature, it is quite an easy task. In this article, we explain in detail how you can enable or disable the Enhance audio feature in your Windows 11.
How to Enable Enhance Audio Feature in Windows 11
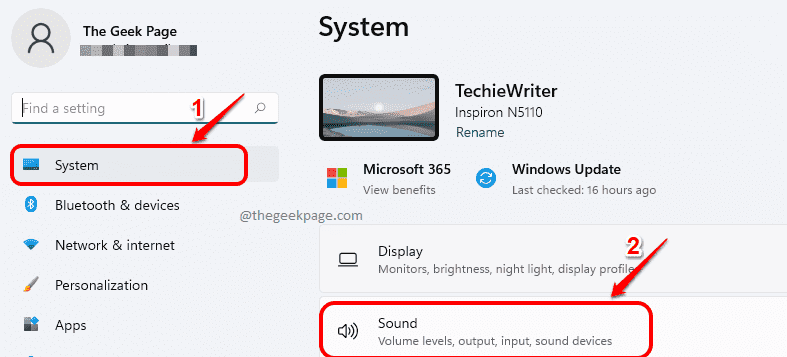
Step 1: Open the Settings app by pressing the Win and I keys together.
In the left window pane, click on the System tab and in the right window pane, click on the Sound tab.
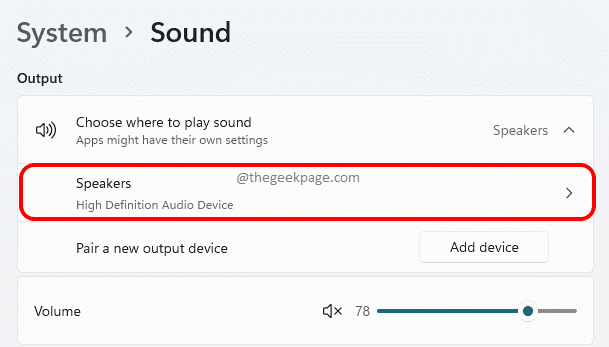
Step 2: Under the Sound settings, find and click on the entry named Speakers under Output header.
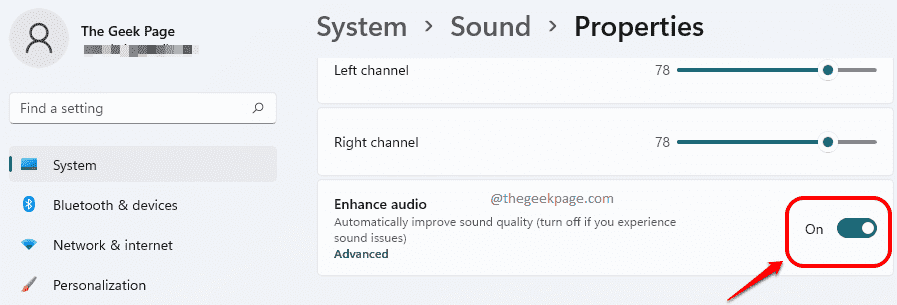
Step 3: Now, scroll and locate the toggle button corresponding to the option Enhance audio. Turn the toggle button On to improve the sound quality.
Step 4: As next, click on the link that says Advanced that is linked to Enhance audio section.
Step 5: In the Speaker Properties window, click on the Enhancements tab. Here you can select whichever enhancement you would like to turn on. Once done, hit Apply button and OK button.
That’s it. Your audio quality should now be improved.
How to Disable Enhance Audio Feature in Windows 11
If in future you would like to disable the Enhance audio feature for some reason, you can do so by turning the toggle button off for the Enhance audio option as shown in the screenshot below.
Please tell us in the comments whether you found the article useful.


