Sometimes it may seem that you are not able to directly run a check disk operation on a certain volume (a part of your HDD) on your computer. If you are facing this issue, then follow our fixes to solve the issue on your computer. This problem usually occurs due to corrupted files on the particular drive.
Workarounds–
1. Restart your device and try again.
Fix 1 – Run a chkdsk scan
Running a check disk from CMD on your computer should fix the problem on your computer.
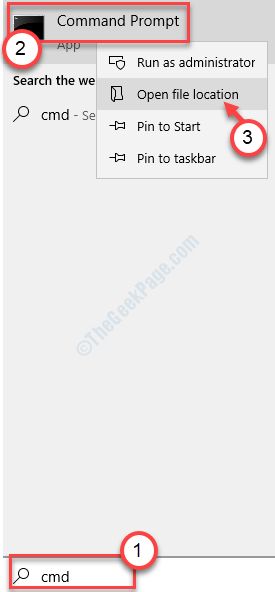
1. Press Windows key+S. Then, type “cmd“.
2. Then right-click on the “Command Prompt” and then click on “Run as administrator” to access it.

3. When the CMD appears, type and modify the code. Then hit Enter to run the operation.
chkntfs /X drive letter
[NOTE–
Change the “drive letter” in the command and place the drive letter of the problematic drive.
Example- We are facing this issue with the H: drive on our computer. So the command will be like this-
chkntfs /X H:
]

4. After checking the format of the drive, copy-paste this command and hit Enter to run a check disk operation.
chkdsk /f driveletter

[NOTE– This ‘driveletter‘ is the drive letter of the problematic drive.]
After running this operation on your device, Windows will check the disk for any faults and solve the problem.
Fix 2 – Disable startup of antivirus services
The virus scanner tool on your computer may cause this issue.
1. Press Windows key+R.
2. Write “services.msc” and then hit Enter.

3. In the services list find out the list of services, find out the service related to your antivirus.
4. Double click on that service to modify it.
5. When the Properties window opens up, click on the drop-down.
6. Set the startup type: to “Disabled“.
7. To stop the service, click on “Stop“.

8. Finally, click on “Apply” and “OK” to save this modification.

Reboot your device.
Check if you can check the disk or not.
Fix 3 – Run checkdisk in Clean boot
Clean boot your device and run check disk on the drive again.
Steps to clean boot your PC-
1. You have to search for the “System Configuration“.
2. After that, you have to click on the “System Configuration“.

3. Then you need to click on the “General” section.
4. Simply after that, click on the “Selective startup” option.
5. After that step you have to check the box beside the “Load system services.

6. Then, go to the “Services” section.
7. Since that, click on the “Hide all Microsoft services“.
8. Finally, click on “Disable all“.

All the third-party systems will be disabled.
8. Simply, click on “Apply” and “OK”.

Now restart your computer in clean boot mode.
After you have logged into your account, follow the steps of the first fix to run the check disk command.
Fix 4 – Format the drive
If nothing is working and there is nothing crucial on the problematic drive, formatting it can be an option.
1. Press Windows key+E.
2. To see all the drives on your computer, click on “This PC“.

3. Then, right-click on the problematic drive and then click on “Format“.

4. Simply, click on “Start” to start the formatting process.

After formatting the drive you can easily use the drive again.