If you want to free up space in your drive or want to get unallocated space for extending another drive you can do this by removing a hard drive data partition in windows disk management. But sometimes when users try to perform the delete action, it will not be possible because the delete volume option will not be enabled. This might be because of different reasons like the volume you are trying to delete might contain system files, or there might be a page file on that particular volume, etc. In this article let us see different methods to delete the Partition/Volume on Windows 10. Let us start.
Method 1: Manage Paging File Size For All Drives
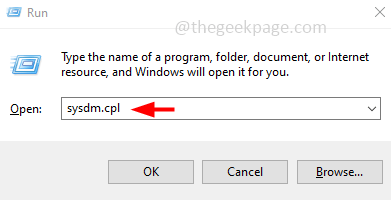
Step 1: Open the run prompt using Windows + R keys together. Type sysdm.cpl and hit enter
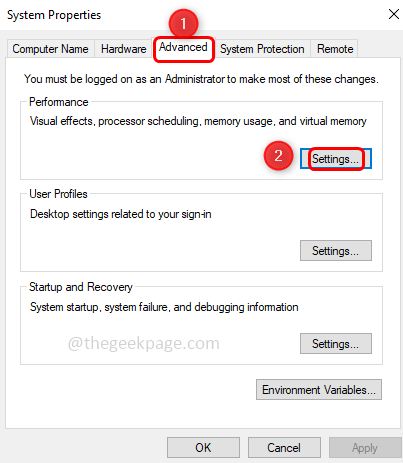
Step 2: The system properties window will be opened. Click on the Advanced tab
Step 3: In the performance section click on Settings
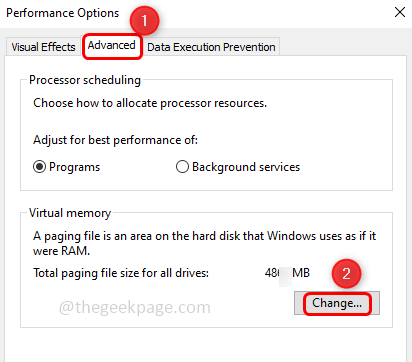
Step 4: The performance options window will open, click on the advanced tab
Step 5: In the virtual memory section, click on the change button
Step 6: Uncheck the checkbox beside “Automatically manage paging file size for all drives“. To uncheck, click on the checkbox and there should not be any tick mark in the checkbox
Step 7: Select the Drive volume label that you want to remove

Step 8: Click on the radio button beside the “No paging file” to enable it
Step 9: Click on the Set button and then click on OK

Step 10: Close the system properties and restart the system.
Now, open the disk management and check if you can delete the volume
Step 1: Open the run prompt using Windows + R keys together, type diskmgmt.msc and hit enter
Step 2: Right-click on the drive that you want to delete and you should see the delete volume option enabled. Click on it to delete.
Method 2: Use The Diskpart Utility
Another way to delete the partitions is to execute the commands is diskpart
Step 1: Open the run prompt using Windows + R keys together, type diskpart and hit enter
Step 2: A user account control pop-up will appear, click on yes
Step 3: Type the below commands in the opened diskpart utility one by one and hit enter to execute.
Note: In the below commands ‘a’ means the disk numbers and ‘b’ means the partition number
list disk
select disk a
list partition
select partition b
delete partition override
Step 4: Restart the system and check if you could remove it
That’s it! I hope this article is helpful and easy to be followed. Thank you!!


