Latest windows versions have been exceptionally friendly for the visually impaired users as well, with the help of a new feature called Braille support. Though this feature, you can enable the Braille support for your machine by downloading the necessary drivers. Also, it lets you add a Braille display device. You have the options to set the input and output languages as well.
Read on, to learn more about this wonderful feature and to set it up successfully in your brand new Windows 11.
How to Enable Braille Support
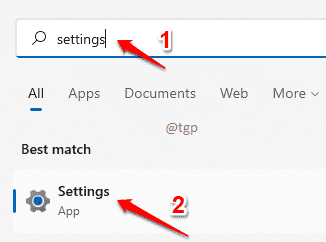
Step 1: Click on the Search icon in the taskbar.
Step 2: As next, type in settings in the search bar and click on Settings option from the search results.
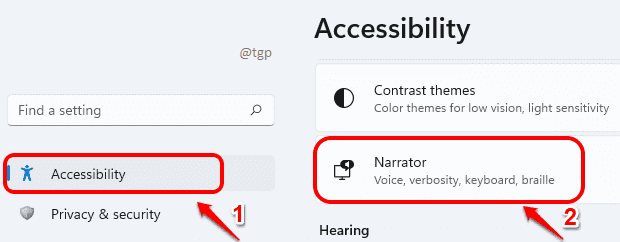
Step 3: In the left window pane, click on Accessibility and in the right window pane, scroll down and find the option Narrator.
Step 4: In the Narrator window, scroll down and click on the option that says Use a braille display with Narrator.
Step 5: Now you have to look for the button Download and install Braille. Once you click it, you will get a loading bar for the download.
Wait for the Braille to finish the download and installation. Don’t panic if you see a command prompt screen flashing in between. It is just part of the installation process.
Step 6: Once installed, you will have the choice to turn Braille or off using the toggle button corresponding to Turn on braille tab.
How to Add a Braille Display
Step 1: Under the section Braille displays and drivers, against Braille displays option, click on the Add a braille display button.
Step 2: Now on the Add a braille display window, choose the manufacturer of your braille display through the dropdown arrow associated with Select braille display manufacturer.
You have to select the connection type as well, either USB or Serial. If you select USB, you need not select Port type. Simply click on Add button.
If you select Serial as the connection type, then you have to click on Select output port dropdown menu and select the output port as well. If you are not sure which COM port your display is connected to, you will have to check that in device manager.
Other Braille Options
You can change the Braille display input and output languages under the section Braille display input and output. Table types can also be chosen under this section.
That’s it. We hope you found this article useful.


