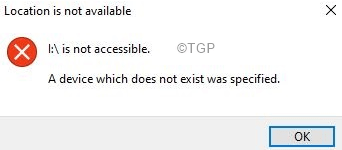
When an external device is connected to the system, you will be able to see that device in the file explorer window. You can access the device by simply double-clicking on it. However, at times, you notice that, even when the device is detected, the device cannot be accessed and an error as shown below is seen
Driver is not accessible
A device which does not exist was specified.
Potential causes to see this error are –
- Missing permissions to access the device drive
- Mismatching Drive letter
- Issues with the Hard Disk
- Outdated Motherboard Drivers.
- Faulty Motherboard Header.
- Defective USB Ports
If you are seeing this error and wondering what is to be done, then read along. In this article, we have curated a list of fixes that can help. Before trying out the specific fixes, try if these simple ones help :
- Restart your system.
- Remove the Hard Disk from the USB port and plug it in again.
- Try connecting to a different USB port.
- In case, the device was connected to USB2.0, try removing it from that port and connecting to USB 3.0 and vice versa.
Fix 1: Ensure you have permission to access the Drive
Step 1: Open the Windows Explorer window using Windows+E
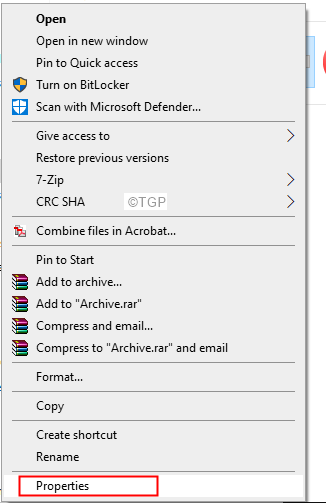
Step 2: Now, right-click on the device driver.
Step 3: Choose Properties
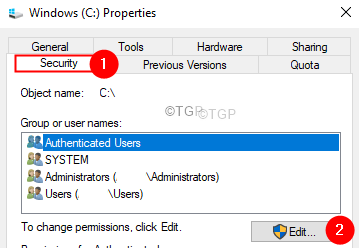
Step 4: From the Properties window, click on the Security tab
Step 5: Click on the Edit button.
Step 6: Now, click on the required user account.
Step 7: Under the Permissions section, tick on the Full control option as shown below.
Step 8: Now, click on Apply and then click on the OK button.
Fix 2: Change the Drive Letter
In some cases, you can see that the Driver letter displayed in the error message does not match the one seen in Disk Management. In this case, correcting the Driver’s letter might help you solve the issue.
Step 1: In the search box next to the Start Menu, type Disk Management.
Step 2: Double-click on the topmost results, Create and format hard disk managemnt as shown below.
Step 3: In the Disk Management window that opens, right-click on the required Disk as shown below.
Step 4: Choose Change Drive Letter and Paths.
Step 5: In the opening window, click on the Change button.
Step 6: In the appearing window, tick on Assign the following letter.
Step 7: From the associated drop-down, choose a letter that is not in Use already.
Step 8: Click on the Ok button.
Step 9: Again, right-click on the Driver and choose Mark Partition as Active
Step 10: Restart the system.
Fix 3: Uninstall and Restart the system
Step 1: In the search box next to the Start Menu, type Disk Management.
Step 2: Double-click on the topmost results, Create and format hard disk managemnt as shown below.
Step 3: In the Disk Management window that opens, from the downward section, right-click as shown below
Step 4: Choose Properties
Step 5: In the Properties window that opens, go to the Driver tab.
Step 6: Click on Uninstall Device button.
Step 7: Now, remove the device and re-connect it.
Check if the issue resolves.
Fix 4: Re-Scan Disks
NOTE: This is a temporary fix and might appear again when you restart the system.
Step 1: Open Disk Management window(Refer Steps 1-2 from above fix).
Step 2: From the top menu options, click on the Action tab.
Step 3: Select Rescan Disks from the drop-down menu.
Check if this works. If not try the next fix.
Fix 5: Update Motherboard Drivers
All the devices that are plugged into the system through USB, HDMI, etc are internally plugged into the motherboard. In case the motherboard drivers are not updated, it could lead to this error.
Step 1: Open the Run Dialog using keys Windows+R.
Step 2: Type msinfo32 and hit Enter
Step 3: Locate BIOS Version/Date as shown below.
Step 4: Check if it is up to date.
Step 5: If you see that the motherboard Driver is not updated, visit your manufacturer’s site.
Step 6: You should be able to find necessary instructions and Driver updates.
Step 7: Follow the instructions carefully and complete the Driver’s updation process.
Fix 6: Change and replace Motherboard Headers
In case you are using an internal hard disk and seeing this error, this might be because of the damaged motherboard headers. In that case, you will have to replace the headers. It is recommended to take the system to a technician to replace the motherboard headers.
That’s All.
We hope this article has been informative. Thank you for reading.
Kindly comment and let us know if you found this article helpful. Also, let us know the fix that helped you solve the error.


