Windows automatically updates your device with occasional updates and patches. Sometimes while checking the status of your Windows Update on your device, you may see this error message ‘Update Error code 0x80240fff’ in the Settings screen. If you are seeing this error code on your computer, follow these suggestions to sort out the problem effectively.
Fix 1 – Install the updates with Update Assitant
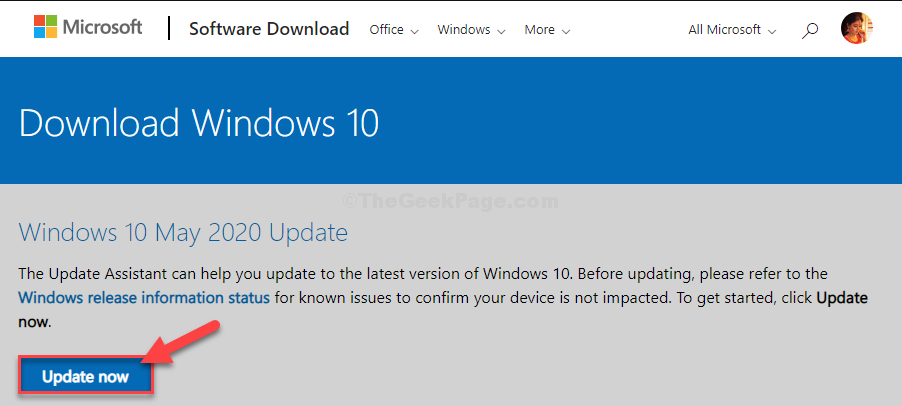
You can update your computer with an Update assistant.
1. Visit this link.
2. Once you have opened the site, click on “Update Now“.

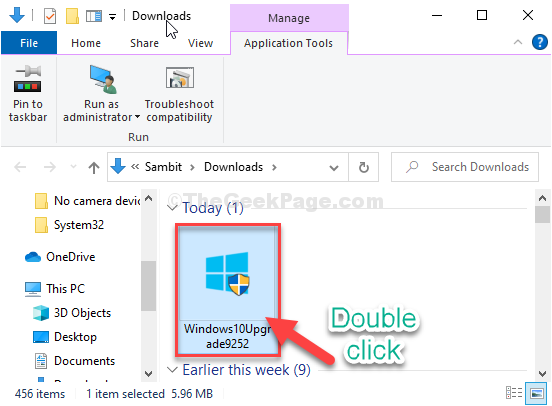
2. Visit the download location on your drive.
3. Double click on the downloaded package.

This tool will search for the latest update package for your computer and download it.
Depending upon the update package, it may take 30 minutes -1 hour to complete the process.
Please be patient.
4. Your device will reboot automatically once you “Exit” the setup.

5. After rebooting your computer, press Windows key+I.
6. Then, click on the “Updates & Security“.
7. After that, click on “Check for Updates” in the Settings window.

You will see that the updates are being downloaded on your computer. This should fix the issue on your computer.
Fix 2 – Update your system with MCT
Creating a Windows Media Creation Tool (MCT) to update your Windows 10 is a very easy process.
1. At first, you have to visit the Microsoft Software Download page.
2. To download the installation media on your computer, you have to click on the “Download tool now”

3. Then, choose a suitable location to download the package.
4. After that, click on “Save” to save the package.

5. Once it is downloaded on your computer, go to that location.
4. After that, double click on “MediaCreationTool2004“.

5. When you are in the Setup screen, click on “Accept” to accept the terms and conditions.
6. Click on the radio button beside “Upgrade this PC now” from the available options.
7. After that, click on “Next” to start the up-gradation process.

Media Creation Tool will recognize the precise update version for your device.
This will solve the problem on your computer for sure.
Fix 3 – Run Windows Update troubleshooter
Windows has an inbuilt Update troubleshooter which may solve this issue.
1. Just right-click on the Windows icon.
2. Then, click on the gear-shaped icon to access the Settings.

2. Then, select the “Update & Security” settings.

3. After that, click on the “Troubleshoot“.
4. Scroll down and click on “Additional troubleshooters“.

5. When the Additional Troubleshooters list appears, click on the “Windows Update“.
6. To start the troubleshooting process, “Run the Troubleshooter“.

Once the troubleshooting process is over, close the troubleshooter window.
Reboot your computer.
Fix 4 – Delay start the BITS
Some users have denoted the delay in starting the BITS will fix the issue.
1. Type “Services” in the search box.
2. After that, click on the “Services” in the search result.

3. When the Services window opens up, look out for the “Background Intelligence Transfer Service“.
4. To modify it, double click on the service.

5. When you are in the Properties window, simply click on the drop-down.
6. After that, choose “Automatic (Delayed Start)“.
7. Don’t forget to initiate the service by clicking on “Start“.

8. Finally, click on “Apply” and “OK“.

Close the Services utility.
After that, reboot your computer.