The “Runtime Error: Could not call proc” message indicates a problem with a procedure (proc) call in your code. This error can also be triggered by a malware on your computer. So, if a malware has entered your system and infected certain system files, it may cause a runtime error, leaving it unable to make a proper procedure call. Additionally, this error may also appear while installing a new program on your computer.
Fix 1 – Change the %Temp% folder
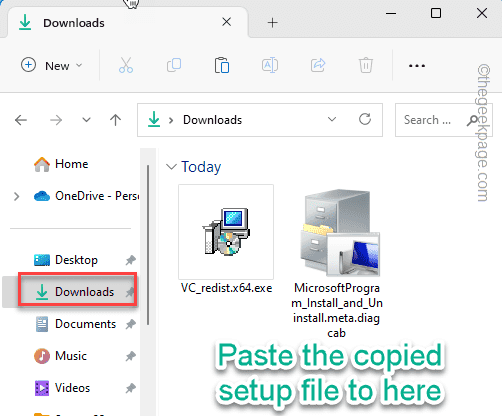
Put the installer file inside Downloads folder and run the installer from the CMD.
Step 1 – Put the installer file in Downloads
You have to put the main installer file in your User Downloads folder.
Step 1 – Copy the installer setup file.
Step 2 – Go to this location –
C:\Users\%username%\Downloads
Step 3 – Then, paste the installer file inside here.
Step 2 – Run the installer using terminal
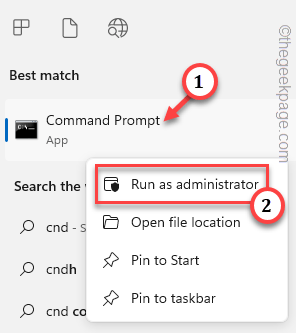
Step 1 – Tap the Start button once and write “cmd” in the box.
Step 2 – Then, right-tap the “Command Prompt“. Then, just tap “Run as administrator“.
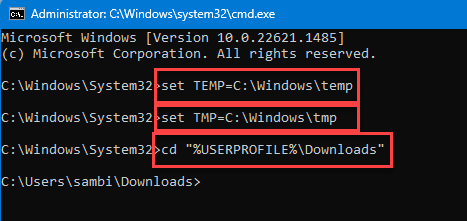
Step 3 – Just input these three lines one after another and hit Enter.
set TEMP=C:\Windows\temp
set TMP=C:\Windows\tmp
cd "%USERPROFILE%\Downloads"
Step 4 – Now, go back to the Downloads folder. Copy the setup file name from there.
Step 5 – Come back to the terminal. Paste the name of that file in terminal and hit Enter. [No need to put any extension following the file name. See the attached picture for better idea. ]
setup file name

After changing the default path of the Temp folder, you can go ahead and try to launch the program once again. You won’t run into Runtime Errors again.
Fix 2 – Delete the Untrusted Certificates
Sometimes stored up Untrusted Certificates can cause this “Runtime Error: Could not call proc windows“. So, clear up related Untrusted Certificates.
Step 1 – Using the Win key+R keys together, open a Run dialog box.
Step 2 – Input this shortcut in the empty box. Click “OK“.
certmgr.msc
Step 3 – Look for the “Untrusted Certificates” and double-tap it.
Step 4 – Then, open the “Certificates” to open it.
Step 5 – Here, you will find the complete list of certificates. Check whether any of these certificates are related to the app which is throwing up the Runtime error message (like if you are experiencing this issue in MalwareBytes, look for MalwareBytes certificates.)
Step 6 – Just, select and right-tap those certificates and tap “Delete“.
Exit the Certificate Manager window. Run the application and test whether you are still seeing any Runtime Error or not.
Fix 3 – Run the Program Install and Uninstall troubleshooter
The second solution in the line is the Program Install and Uninstall troubleshooter. It isn’t available directly on your Windows machine.
Step 1 – You have to download the Program Install and Uninstall troubleshooter. Go here.
Step 2 – There, tap “Download troubleshooter“.
Step 3 – After downloading the troubleshooter, run the “MicrosoftProgram_Install_and_Uninstall.meta” file.
Step 4 – Choose “Next” and when you appear at the main page, select “Installing“.
Step 5 – Again, click “Next“.
Step 6 – Troubleshooter will automatically open up a full list of applications. Choose the application you are trying to install.
Step 7 – Then, tap “Next” to follow up.
This troubleshooter will try to install the application. You shouldn’t face anymore problems.
Do check whether this fixes the “Runtime Error: Could not call proc” issue.
Fix 4 – Download and run the Visual C++ Redist files
Download the latest Visual C++ 2015-2022 files and install it on your computer.
Step 1 – Go ahead to the Microsoft Visual Redistributable file.
Step 2 – Then, click on the link according to the CPU-architechture you have (normally it is x64).
Step 3 – After downloading the setup file, go ahead and open File Explorer.
Step 4 – Now, run the “vcredist” setup file.
Step 5 – Just, check the “I agree to the license terms and conditions” box.
Step 6 – Then, click “Install” to install the Visual C++ Redistributable files.
After installing the latest Visual C++ files, restart the system.
Run the build once again. You won’t face any Runtime issues again.
Fix 5 – Reinstall the program
Just uninstall the faulty program and reinstall it. Sometimes there are some irreversible issues with the program code and there is nothing you can do with the existing build. So, to save both your precious time and effort, it should be better if you just uninstall the current version of the program and install the latest version of it.
Step 1 – Press the Win key and the X keys together.
Step 2 – Then, tap “Installed apps” to open that up.
Step 3 – Here locate the problematic app and uninstall it from your computer.
You may have to follow some of the steps on the particular app installer page. Complete the uninstallation process.
Check if this works out for you.


