If you are using a VPN as your primary connection or even sometimes, you may come across an error message, “The Remote Connection was not Made Because the Name of the Remote Access Server did not Resolve“. This error message pops up when you are trying to connect to a VPN.
The error can arise either due to an issue with the VPN server or if any issue with your computer’s connection. While a VPN can be useful these days, it can sometime throw in unexpected errors related to VPN connection. And, one such annoying issue is the Remote access server did not resolve error in Windows 10.
Fortunately, this error can be resolved. Let’s see how.
Method 1: By Flushing DNS Cache and Resetting Winsock
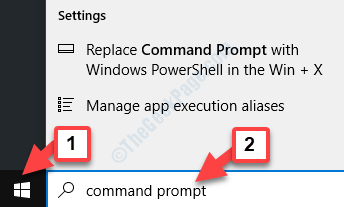
Step 1: Navigate to the Windows icon (Start) on the bottom left of your desktop and type Command Prompt in the search field.

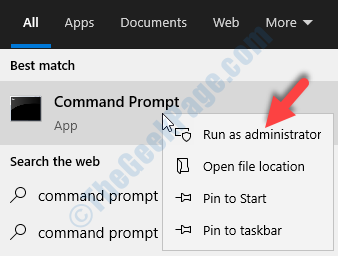
Step 2: Right-click on the result and select Run as administrator from the right-click menu to open Command Prompt in admin mode. .

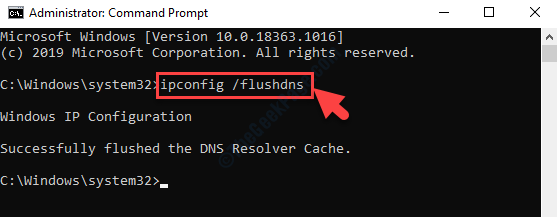
Step 3: In the Command Prompt window, run the below command to flush the DNS:
ipconfig /flushdns

Step 4: Now, execute the below command to register the DNS server:
ipconfig /registerdns

Step 5: Then run the below two commands one by one and hit Enter after each command:
ipconfig /release

ipconfig /renew
Step 6: Now, run the below command to reset the winsock:
Netsh winsock reset

Now, simply reboot your PC and check if the VPN error is gone. You should now be able to browse without any issues.
Method 2: Through Network Connections
Step 1: Press Win + R together on your keyboard to open the Run command.
Step 2: In the Run command search field, type ncpa.cpl to open the Network Connections window.

Step 3: In the Network Connections window, right click on the VPN adapter (Ethernet 2 in this case) and select Properties from the right-click menu.

Step 4: In the VPN Properties window, under the Networking tab, go to This connection uses following items section.
Here, go to Internet Protocol Version 4 (TCP/IPv4). Select it and click on the Properties button below.

Step 5: In the Internet Protocol Version 4 (TCP/IPv4) Properties dialogue box, under the General tab, go towards the bottom and select the radio button next to Use the following DNS server addresses.
Now, Enter the Google Public DNS server as shown below:
Preferred DNS server - 8.8.8.8

Alternative DNS server - 8.8.4.4

Press OK to save the changes and exit.
Now, you can check back and there should be no further related to VPN. You will now be able to browse normally. However, if you are still facing the issue, try the 2nd method.
Method 3: Turn Off Firewall
1 – Open Control panel
2 – Paste the given below path in address bar of control panel
Control Panel\System and Security\Windows Defender Firewall

3 – Now, Click on Turn Windows Defender firewall on or off from left side menu

4 – Now, Turn Off the firewall for both private and public network settings and click OK

Now, try again.