If you can’t connect to the network and an error message stating ‘ One or more network protocols are missing’ or ‘Windows sockets registry entries are missing‘ message is appearing when you are trying to run Network Diagnostics, don’t worry. This problem may be happening because of the bad network settings on your system.
Initial Workarounds–
1. Check if all the network cables are plugged incorrectly. Unplug the ethernet cable from your computer and plug it in again. Check the network connection.
2. If you are using a router, reboot your router and try to connect again.
If any of these simpler tricks don’t help at all, go for these fixes-
Fix-1 Disable NetBios over TCP settings-
Disabling the NetBios over TCP settings has helped many users.
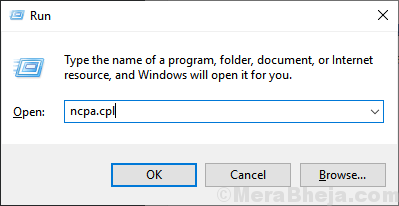
1. Simply by pressing Windows key+R will open up a Run window.
2. To open the Network Connections window. type “ncpa.cpl” and then press Enter.

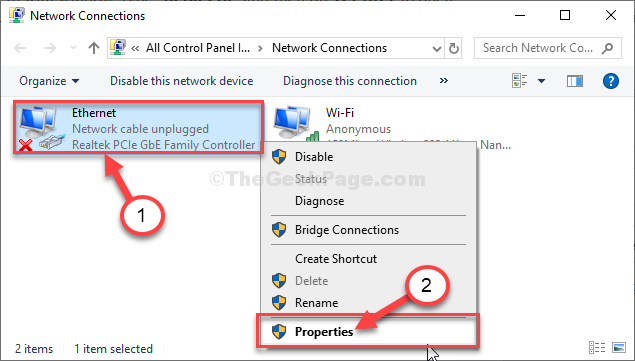
3. At the next step, what you need to do is to right-click on your network adapter and then click on “Properties“.

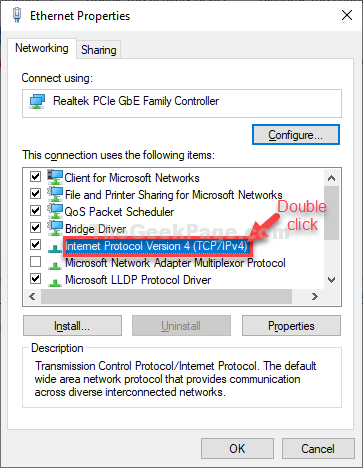
4. To modify “Internet Protocol Version 4(TCP/IPv4)“, double click on it.

5. Then, click on the “Advanced” settings to modify it.

6. Now, you need to go to the “WINS” tab.
7. After that, choose the “Disable NetBIOS over TCP/IP” option.
8. To save this change, click on “OK“.

9. Then, again click on “OK“.

Close Network Connections window.
Fix-2 Use CMD to fix the issue-
Simply by passing a command you can reset your IP configuration which will solve the issue.
1. Press Windows key+R to launch Run window on your computer.
2. Write “cmd” in that terminal and then hit Ctrl+Shift+Enter together.

3. You can solve this issue by
NETSH INT IP RESET C:\RESETLOG.TXT

Close Command Prompt window.
After resetting, it will portray this message on CMD window-
“Resetting- OK!
Restart the computer to complete the action.”
Reboot your computer. After rebooting your computer and try to connect to the network again.
NOTE–
Some of the users may see “Access is denied” error message while executing this command. Follow these steps to solve the issue-
1. At first, what you need to do is to type “regedit“.
2. Then, click on “Registry Editor” from the search results to open it on your computer.

3. Go here-
Computer\HKEY_LOCAL_MACHINE\SYSTEM\ControlSet001\Control\Nsi\{eb004a00-9b1a-11d4-9123-0050047759bc}\26
4. Now, on the left-hand side of the window, right-click on “26” and then click on “Permissions“.

5. Then, select “Everyone“.
6. Now, check the parameter ‘Allow‘ beside the “Full Control” to give full access to every one of this folder.

7. Now, simply, click on “Apply” and then on “OK“.

Close Registry Editor window.
Now, open Command Prompt window and run the command again (Step-3 of Fix-2). After executing the command reboot your computer.
Your problem will be solved.