In this article i will tell you how to change your network location from public to private and make it discoverable on the network . Normally when you connect to the Wifi Network or Ethernet connection for the first time on your PC, its asks you to choose from the two options namely Public & Private. But, once it remembers the network, it never asks you again.
Public network means that the Network discovery and sharing is turned off, while in Private network mode the Network discovery of your PC and sharing on other devices on the same network are turned on. The names are bit confusing as here Public network means No discovery and Private means discoverable on the same network.
Change from Public to Private Network Profile using settings
1 – Open Settings by clicking on the Windows icon on the taskbar and then clicking on Gear icon.

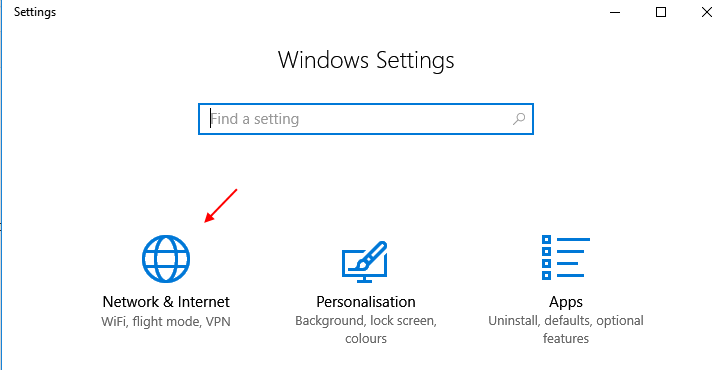
2 – Now, Click on Network & Internet

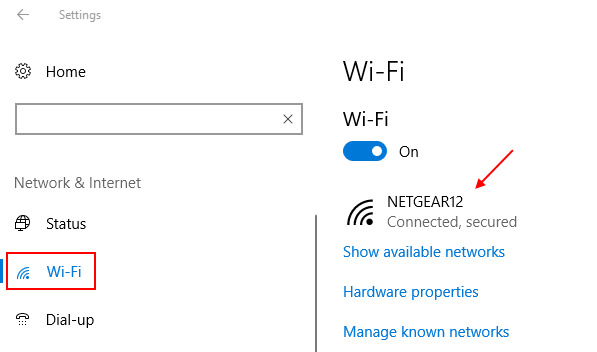
3 – Now, Click on WiFi from left menu.
4 – Finally click on your WiFi network name on which you are connected.

Note: – If its Ethernet connection click on Ethernet from left menu and then click on your ether net icon on the right.

5 – Now, Choose Private as your network profile.

That is it. This will make your content discoverable on the network on your windows PC.
Change from Public to Private Network Profile using Powershell
1- Search Powershell in Taskbar search box and then click on icon of powershell showing up in results.
2 –Right click on Powershell and click run as admin.

3 -Now, run the command given below to know your network name
Get-NetConnectionProfile
Note down the name of the Network from first field Name.

4 – Now, run the command shown below to change that network to Private
Set-NetConnectionProfile -Name "Name of network" -NetworkCategory Private
Just change name of network with the name of network you just noted in step 3.
For example in my case the code will be :
Set-NetConnectionProfile -Name “New Geecko” -NetworkCategory Private
If you want to set it to Public then run the command given below instead of the above
Set-NetConnectionProfile -Name “TLRouter” -NetworkCategory Public
5 – Close the Powershell window
Change from Public to Private Network Profile using registry
1 – Search Registry editor in search box.
2 -Now, click on Registry editor

3 -Now, Go to the following path by copy and pasting the path below in address bar of registry
HKEY_LOCAL_MACHINE\SOFTWARE\Microsoft\Windows NT\CurrentVersion\NetworkList\Profiles
4 – Now, Double click on each folder under Profiles in left side and then click on ProfileName every time to check which is your network

5 – Once you are sure this is the network with same value data as network name, Just double click on Category in right side.
Now, change the value data accordingly: –
- Public: 0
- Private: 1
- Domain: 2

6 -Close the registry and reboot PC.