.NET runtime optimization service, also known as mscorsvw.exe is a Windows component that optimizes your system by helping it start apps and programs faster. But, sometimes the optimization process may take longer than usual and that’s when you see a high CPU usage when you open the Task Manager.
The high CPU usage issue by .NET runtime optimization service especially occurs after a Windows update to the latest version. It’s more likely a Microsoft bug messing with the Registry settings that leads to the issue. However, we have found out a solution for you that can fix this .NET runtime issue thus, allowing it to run normally. Let’s see how.
Solution 1 : Through Command Prompt
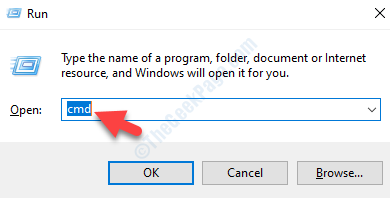
Step 1: Press Win + R keys together on your keyboard to open the Run command.
Step 2: In the Run command box, write cmd and press Ctrl + Shift + Enter keys together on your keyboard to open the Command Prompt in elevated mode.

Step 3: As the Command Prompt window open in Admin mode.
For 64 Bit system type the below commands one by one and hit Enter after each command:
cd c:\Windows\Microsoft.NET\Framework64\v4.0.30319

cd c:\Windows\Microsoft.NET\Framework\v4.0.30319

ngen.exe executequeueditems

Now, you can go back and check in the Task Manager and the .NET runtime optimization service should not show high CPU usage anymore.
Solution 2 – By downloading and running .wsf file from Github
1. Go to this link on Github.
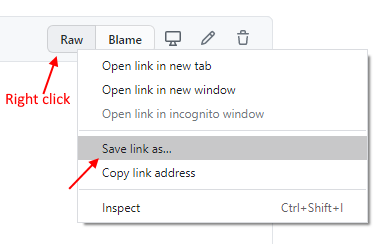
2. Right click on Raw and click on Save link as.

3. Now, click and run this downloaded wsf format file on your computer.

4. If a prompt asks you to type of program with which this program is to be run with, then choose Windows Script Host.
Solution 3 – Restart NVidia Telemetry service
1. Search services in windows 10 search box then click on services search icon to open service manager.
2. Now, locate NVIDIA Telemetry Container service.
3. Double click on this service to open property window.
4. Make sure startup type is automatic.
5. Now, click on stop the service and then again click on start to start the service.

Note: – If you get error with error message “Windows could not start the service on Local Computer. Error 1079”, try to do steps as given below.
1 – Click on Log On Tab
2 – Now, click on Browse
3 – type your account name
4 – Click On OK.
5 – Finally click on Apply and click on OK and close all the windows.
6 – Now, try again.
