The possible reason behind the Local Security Authority (LSA) option missing from the Windows Security app can be the corruption of the Windows Security main components. Sometimes, if you haven’t updated the system in a while, Windows Security definitions can become quite obsolete. These are the solutions that should help you get back the missing piece.
Fix 1 – Manually create the RunAsPPL key
Create the RunAsPPL key and subsequent value to fix the LSA problem in Windows Security.
NOTE – Registry edits are not that easy. Sometimes, these edits can go wrong and can be dangerous. So, take a backup of the registry file so that you can use it later.
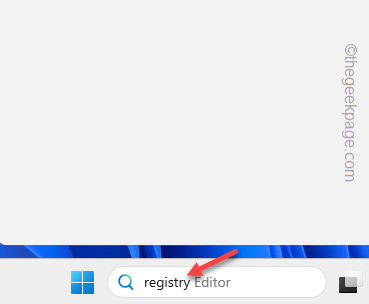
Step 1 – You just have to write “registry” in the box and hit Enter.
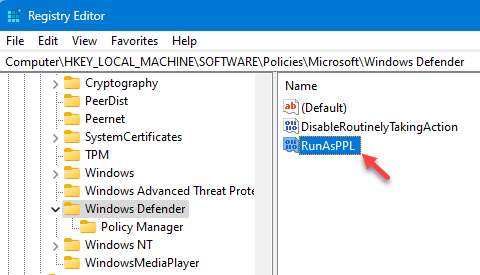
Step 2 – As soon as you get into the Registry Editor window, go to this LSA key –
Computer\HKEY_LOCAL_MACHINE\SOFTWARE\Policies\Microsoft\Windows Defender
Step 3 – Try to find the “RunAsPPL” value.
Step 4 – Double-tap that value so that you can place a value on it.
[
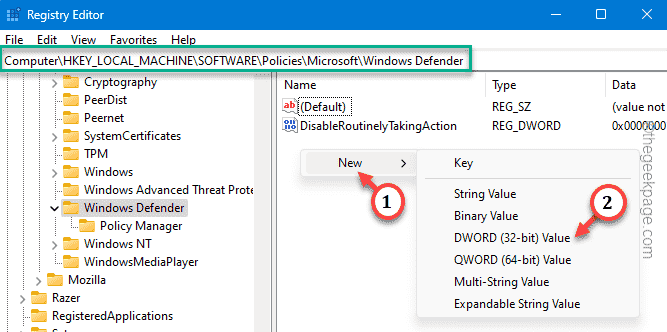
Can’t find the “RunAsPPL” value? Create the value manually.
1. Directly right-click on the right pane of the Registry Editor page and tap “New>” and click “DWORD (32-bit)” to create a new value.
2. Rename this value to “RunAsPPL“.
]
Step 5 – Fix the value to “1” in the correct place.
Step 6 – Click “OK” to save this change.
To enact this change, you have to restart the machine. After this, restart the system.
Fix 2 – Enact the LSA group policy
LSA can be blocked using a Group Policy fix.
Step 1 – You can directly open the Group Policy. To do that, hold the Win+R keys at once.
Step 2 – Place this term there. Tap “OK” to open it.
gpedit.msc
Step 3 – Expand the left pane to reach the LSA security policy –
Computer Configuration > Administrative Templates > System > Local Security Authority
Step 4 – Open the ” Configure LSASS to run as a protected process ” policy so that you can change it.
Step 5 – At first, switch the policy to “Enabled” mode.
Step 6 – Then, set the ‘Configure LSA to run as a protected process‘ to “Enabled with UEFI Lock” mode.
Step 7 – You can only apply this policy by clicking on “Apply” and “OK“.
Close the Local Group Policy Editor screen. This LSA policy modification can only take place after a system reboot.
So, reboot the machine.
Fix 3 – Repair the Windows Security
The third solution for you is to repair the Windows Security.
Stage 1 – Repair the app
Step 1 – Open the Start menu by pressing the Windows button once.
Step 2 – Then, write “powershell” there.
Step 3 – Upon seeing that, right-click that and tap “Run as administrator“.
Step 4 – Directly place this code in that opened PowerShell terminal. Then, hit Enter to execute that.
Get-AppXPackage | Foreach {Add-AppxPackage -DisableDevelopmentMode -Register "$($_.InstallLocation)\AppXManifest.xml"}
Now this single command will repair all the system apps at once. But your work is not done yet.
Stage 2 – Delete the Windows Security registry key
You have to remove Windows Security-related registry keys from your system.
Step 1 – Hit the Win+R keys from your keyboard.
Step 2 – Directly type “regedit” in there, and use the Enter key to open the Registry Editor.
Step 3 – Straight get to this point, expanding one key after another –
Computer\HKEY_LOCAL_MACHINE\SOFTWARE\Policies\Microsoft\Windows Defender
Step 4 – Then, right-click the “Windows Defender” key and use the “Delete” option in the context menu to delete it.
There will be a warning message. Go ahead and tap “Yes” to confirm this removal.
Restart your computer to let this registry change take effect.
Fix 4 – Update the Windows Security app
You should update the Windows Security application and test that.
Step 1 – Start to input “powershell” after using the Win+S at once.
Step 2 – You can right-click the “Windows PowerShell” when you see that. Next, tap “Run as administrator“.
Step 3 – Copy-paste this command into the administrative PowerShell. Hit Enter to update the Windows Security app.
Get-AppPackage Microsoft.SecHealthUI
Windows Security Application updates will be installed on your device soon.
Check if this helps your case.
Fix 5 – Update your computer
Windows Security gets regular updates through various Windows Update streams.
Step 1 – Open Settings. Get to the “Windows Update“.
Step 2 – To enquire about the latest updates, tap “Check for updates” on the opposite side.
Windows will start downloading the latest Windows Security updates and install them as well. Restart the system to complete the changes.
Do check the status of the LSA in Windows Security.
Fix 6 – Enable Virtualization in BIOS
Local Security Authorization (LSA) activates only when you have enabled the Virtualization in BIOS mode.
Step 1 – At first, restart your computer.
During the reboot process, directly press and hold the key that opens the BIOS. This will take you directly to the BIOS page.
Don’t worry, if you have missed that key for the first time. Let the system start and retry the process.
NOTE – In some systems, you may have to use both the Fn and the associated key to open the BIOS screen.

Step 3 – Go to the “Advanced” tab.
Step 4 – Now, once you reach BIOS settings, find the “Virtualization” or “Hardware Virtualization Support” feature. Turn it On.
Step 5 – Finally, save and exit the BIOS page.
Automatically your system will restart. Log in to your account and check the status of the LSA once more in Windows Security.


