Some of the Windows 11 users are not taking alike towards the new altered looks of the File Explorer. If you are one of these users who are trying to get back their old File Explorer back, you are just at the right place. There is a very easy way to restore the older File Explorer back to Windows 11. Simply follow the instructions mentioned here to restore the older style of Windows Explorer.

How to restore the old Windows 10 Explorer in Windows 11
You have to create a particular key in the Registry Editor and restart the File Explorer in due process and you will get back the older Windows 10 File Explorer aesthetics back.
Step 1 – Create a new keY
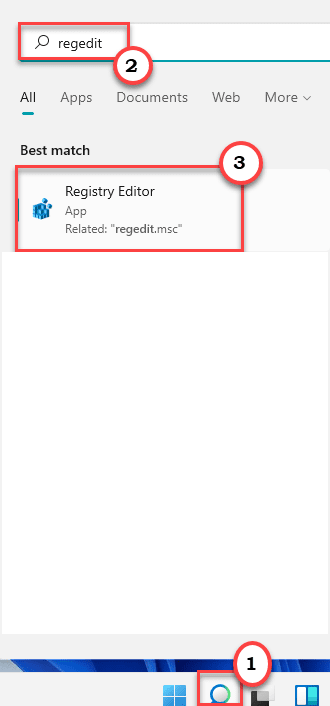
1. At first, click on the search icon and type “regedit“.
2. Then, tap on the “Registry Editor” to open up the Registry Editor.

NOTE –
In the following process, you will have to add a new key to the registry. This may cause some issues which may even brick the system. So, we suggest you create a backup of the registry keys if you haven’t created one yet.
a. Once you have opened the Registry Editor, you will need to click on the “File” and then click on “Export“.
b. Save the backup in a secure place.

3. When the Registry Edit0r opens up, go to this key location –
Computer\HKEY_LOCAL_MACHINE\SOFTWARE\Microsoft\Windows\CurrentVersion\Shell Extensions\Blocked
4. Then, on the right-hand side, right-click on space and tap on “New“.
5. Further, choose the “String Value” to create a new string value.

6. Then, right-click on the “New key#1” and tap on the “Rename” to rename the key.

7. Now, name the key as “{e2bf9676-5f8f-435c-97eb-11607a5bedf7}“.

After doing this, close the Registry Editor.
Step 2 – Restart the Explorer process
Now, all that you have to do is to restart the Explorer process on your computer.
1. Then, right-click on the Windows icon and click on “Task Manager“.

3. When the Task Manager opens up, scroll down to locate the “Windows Explorer” process.
4. Then, right-click on the process and click on “Restart” to restart the File Explorer process.

Close the Task Manager. That’s it! Open the File Explorer. You will notice that the older Windows 10 File Explorer menu bar has appeared in the File Explorer.
How to restore the standard Windows 11 File Explorer
In the future, if you want to restore the standard Windows 11 File Explorer, you can easily do it by removing the particular key from the system.
1. Open the Registry Editor on your system.
2. Then, go to the same location as before –
HKEY_LOCAL_MACHINE\SOFTWARE\Microsoft\Windows\CurrentVersion\Shell Extensions\Blocked
3. Now, on the right-hand side, right-click on the “{e2bf9676-5f8f-435c-97eb-11607a5bedf7}” key and then click on “Delete” to remove it.

4. You will receive a warning message, tap on “Yes” to finally remove the key.

Then, close the Registry Editor screen.
5. Now, press the Windows key+R key together.
6. Then, type “taskmgr” and hit Enter.

7. After that, locate the “Windows Explorer“. Then, right-click on it and click on “Restart“.

Close the Task Manager.
Upon restarting the File Explorer, the usual Windows 11 File Explorer will be back again.