Many users reported seeing an error when they try to open some files. The complete error message reads –
This file does not have a program associated with it for performing this action.
The error is not specific to any single application and is seen with Excel, PDF Readers like Adobe, etc. Some users have seen this issue after inserting their Storage devices and tried checking its property. Malware in the system is also responsible for this error.
Now that we have an idea of what causes the error, let’s look at the different ways of fixing this error.
Fix 1: Delete some keys from the Registry.
1. Open Run Dialog using the keys Windows+R.
2. Type regedit and press Enter key.
3. In the UAC prompt that shows up, click on Yes.
4. The Registry Editor window opens.
Note: Registry Editing can be risky. It is advised to take the backup of your keys before proceeding. If the changes don’t work you can restore back using the backup file. To take a backup of the keys, go to File > Export > Give a suitable name > Save.
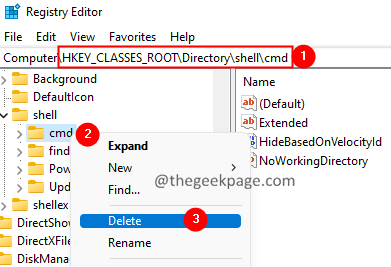
5. In the search bar at the top, enter the below command :
HKEY_CLASSES_ROOT\Directory\shell\
6. From the left-hand side panel, double-click on the shell key.
7. Now, right-click on the cmd folder and click on Delete.
8. If you see a dialog popping up, click on Yes.
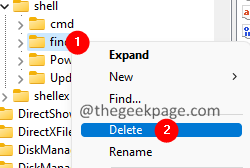
9. Repeat steps 7,8 to delete the find folder as well.
10. Restart your system.
Fix 2: Turn Off the Autoplay Feature.
If the error is when while you plug in your Storage drive to the system, this fix will help you.
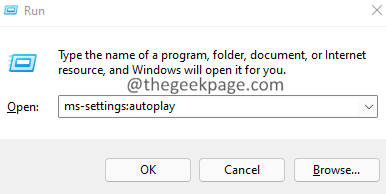
1. Open the run Dialog by holding the keys Windows+ R at the same time.
2. In the Run Dialog window that shows up, enter the below command and press Enter.
ms-settings:autoplay
3. In the appearing window, under the Use AutoPlay for all media and devices, toggle the button to turn off AutoPlay.
Fix 3: Reset the File Association to default.
1. Open Run Dialog using the keys Windows+R.
2. Enter the below command and press Enter.
ms-settings:defaultapps
3. Scroll down to the bottom of the window to locate Reset all default apps section.
4. Click on the Reset button.
Now, try opening the file.
Fix 4: Perform an SFC and DISM Scan
1. Open the Run Dialog using the keys Windows+R.
2. Enter the command cmd and hold the keys Ctrl+Shift+Enter at the same time. This opens the command prompt window in Admin mode.
3. If you see a User Access Control window, seeking permissions, click on Yes.
4. In the Command prompt windows that open up, enter the below commands one after the other, and press Enter.
sfc /scannow
DISM /Online /Cleanup-Image /RestoreHealth
5. Both these scans are going to take a long time to finish, so please wait patiently.
6. Once the scan is done, restart your system.
If there are any corrupt files in the system, they will be repaired. Now try opening the file.
That’s all. We hope this article has been informative. Kindly comment and let’s know the fix that helped you solve this error.
Thank you for reading.


