Nothing can be quicker than you pressing the delete key and the selected file going into the Recycle Bin straight away without any extra steps in between. But what if you don’t want it that way? Let’s say you pressed the delete key for an important file and then the file flew straight to the Recycle Bin without even asking you for your confirmation. Now you have to go through all the trouble of going inside the Recycle Bin, finding and restoring the deleted file. Well, sounds no fun, I know.
So if you get to have a confirmation dialog between the press delete key step and the file going to the Recycle Bin step, things might work out perfect for you. In this article, we explain in 3 steps how you can easily add the delete confirmation dialog on your Windows 11.
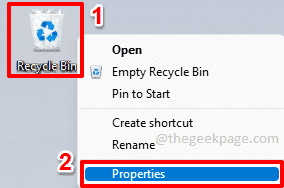
Step 1: Right click on the Recycle Bin icon on the Desktop. Click on the Properties option.
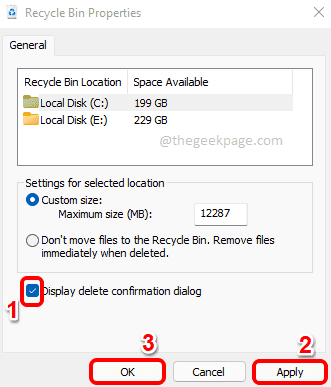
Step 2: On the Recycle Bin Properties window, check the checkbox corresponding to the option Display delete confirmation dialog.
Once you are done, hit the Apply button and then the OK button.
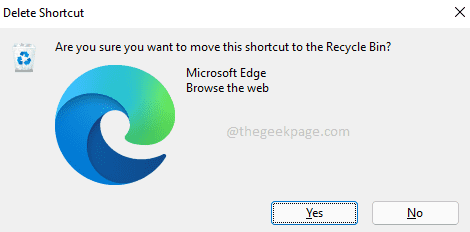
Step 3: That’s it. Now if you delete any file, you will get a delete confirmation dialog box asking whether you are sure that you want to move the file to the Recycle Bin. Enjoy!
Please tell us in the comments section whether you found the article useful.


