The Remote Desktop feature allows users to connect to a system remotely and operate it. If the user account you use to connect to a remote system doesn’t have sufficient permissions, you see the below error-
The Connection Was Denied Because the User Account Is Not Authorized for Remote Login
In this article, we discuss ways to fix this issue while connecting to systems remotely.
NOTE: One should have Admin privileges to perform the below fixes.
Fix 1: Create a new Security Group for Remote Desktop Services
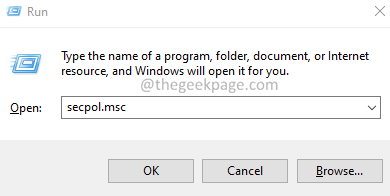
1. Open the Run Dialog using the keys Windows+R.
2. Enter the command secpol.msc, and press Enter.
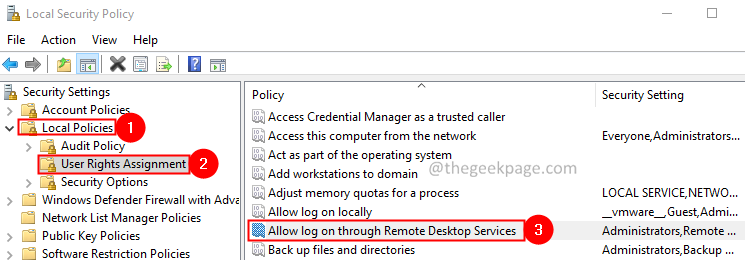
3. The Local Security Policy window opens. Double-click on Local Policies.
4. Now, double-click on Users Right Assignment.
5. From the right-hand side panel, locate and double-click on Allow log on through Remote Desktop Services.
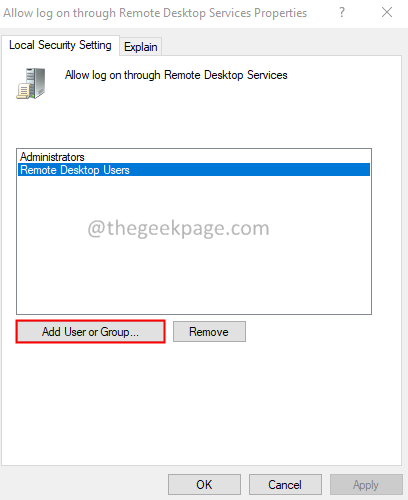
6. Check if you can see Remote Desktop Users listed. If you don’t see it listed, follow the below steps.
7. Click on Add User or Group button.
8. In the Select Users or Groups window, enter Remote Desktop Users, and click OK.
9. You will see a Name Not Found window. Verify the object name, Remote Desktop Users.
10. Click on the OK button.
11. In the Allow log on through the Remote Desktop Services Properties window, click on the OK button.
12 -Now, search cmd in windows search box.
13 – Right click on Command prompt icon from the result.
14 – Select run as administrator.

15. In the Command Prompt window that opens, enter the below command and hit Enter.
gpupdate /force
Check if this solves the error. If not, try the next fix.
Fix 2: Change the Log on for Remote Desktop Services
1. Open the Run Dialog.
2. Enter the command services.msc and press Enter.
3. The Services window opens. Locate the service named Remote Desktop Services and double-click on it.
4. Go to the Log On tab.
5. Click on This account option.
6. Click on the Browse button.
7. In the Select User window, click on the Advanced button.
8. In the appearing window, click on the Find Now button.
9. Under the search results section, double-click on NETWORK SERVICE.
10. In the Select User window, click on OK.
11. Click on the Ok button in the Remote Desktop Services Properties window.
12. Right-click on the Remote Desktop Services and choose Restart.
Fix 3: Provide Sufficient rights to your User Account
1. Open the Run Dialog.
2. Enter the command lusrmg.msc and hit the Enter button.
3. In the opening window, double-click on Users.
4. Now, double-click on your User Account. In this case, it is admin.
5. Go to the Member Of tab.
6. If you do not see Remote Desktop Users listed, click on the Add button.
7. In the appearing window, click on the Advanced button.
8. In the opening window, click on the Find Now button.
9. From the Search results, double-click on the Remote Desktop Users.
10. In the Select Groups window, click on the OK button.
11. Now, you can see the Remote Desktop Users created.
12. Click on Apply and then click on the OK button.
That’s All.
Kindly comment and let us know the fix that helped you solve the error.


