Why does Star Wars Zero Company look great for ten minutes and then turn into a smeary mess? A VRAM leak may have caused this issue. Then, the VRAM is the memory on your graphics card. The game keeps filling it and never properly clears out old stuff when you move between zones. So once it’s full, the engine panics. The textures drop to their blurriest versions and faces turn to mush. And the frame rate usually tanks right along with it. Here are some steps that should fix your issue.
Fix 1 – Update Your Graphics Driver
Boring, I know. But one player on an RTX 5080 said the driver released specifically for this game fixed everything for them, even at max settings.
1 – Open the NVIDIA App or AMD Software,
2 – Check for a driver update, and install it.
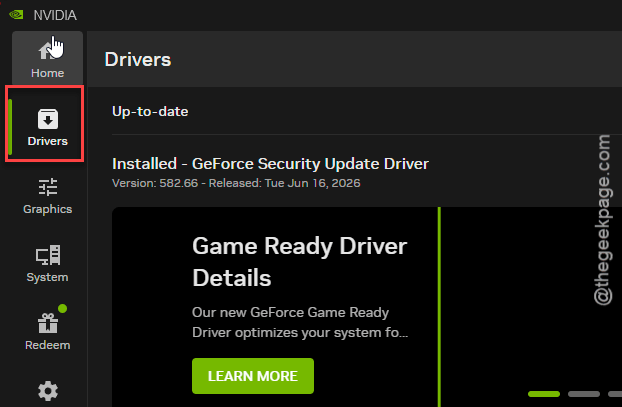
3 – Restart your PC after.
So give it five minutes before you try anything fancier.
Fix 2 – Turn Off Ray Reconstruction
NVIDIA’s Ray Reconstruction (an AI tool that cleans up ray-traced lighting) is leaking memory on 8 GB and 12 GB cards right now. And it grabs the space your textures need.
1 – Open the in-game Graphics Settings.
2 – Scroll down to the Upscaling & Ray Tracing section.
3 – Set NVIDIA Ray Reconstruction to Off.
Leave regular DLSS on. That one’s fine.
Fix 3 – Raise the Texture Streaming Pool
By default, the game caps texture memory so weaker cards don’t crash. The catch? After a few minutes it starts swapping in blurry low-res textures. And they stay blurry.
1 – Close the game.
2 – Press Windows + R, type %localappdata%, and press Enter.
3 – Open the SWZeroCompany folder. Some guides call it ZeroCompany, so look for either name.
4 – Go into Saved > Config > Windows.
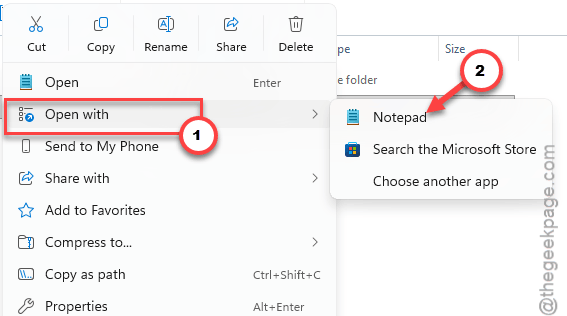
5 – Right-click Engine.ini and open it with Notepad.
6 – Scroll to the very bottom. If there’s no [SystemSettings] line, type it on a new line.
7 – Under it, add r.Streaming.PoolSize=8192. On an 8 GB card, use r.Streaming.PoolSize=4096 instead.
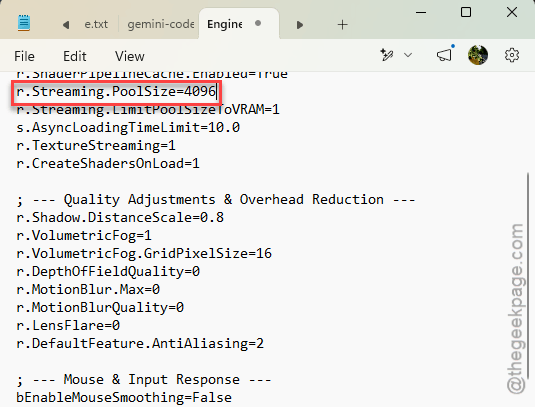
8 – Press Ctrl + S to save, then close Notepad.
9 – Right-click Engine.ini, choose Properties, check Read-only, and click Apply.
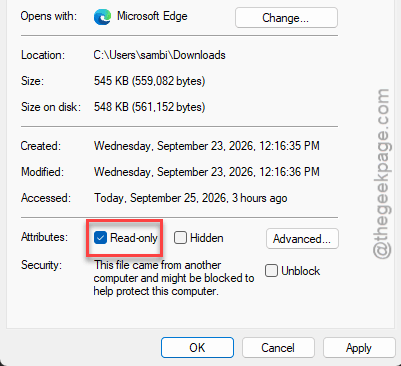
And that read-only box stops the game from quietly undoing your edit.
Rather not type it yourself? There’s a ready-made Engine.ini on Nexus Mods, with one version for VRR screens and one for everything else (VRR means G-Sync or FreeSync).
Launch the game once, close it, drop the file into that same folder, and set it to read-only.
Fix 4 – Turn Off Hardware-Accelerated GPU Scheduling
HAGS is a Windows 11 feature that lets your graphics card manage its own memory queue. But it clashes with this game. Old textures never get cleared, so the leak keeps growing.
1 – Press Windows + I to open Settings.
2 – Click System, then Display.
3 – Scroll down and click Graphics.
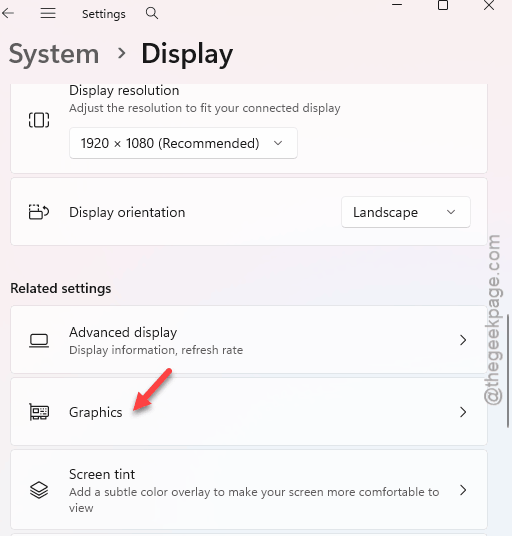
4 – Expand the Advanced graphics settings section at the top.
5 – Turn Hardware-accelerated GPU scheduling off.
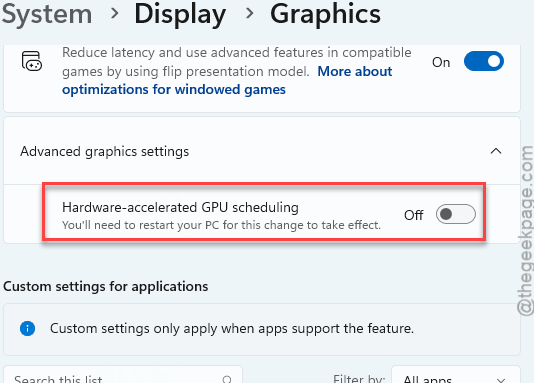
6 – Restart your PC.
Want proof it worked?
1 – Open Task Manager with Ctrl + Shift + Esc,
2 – Then, go to the Performance.
3 – Check the GPU, and watch the dedicated memory.
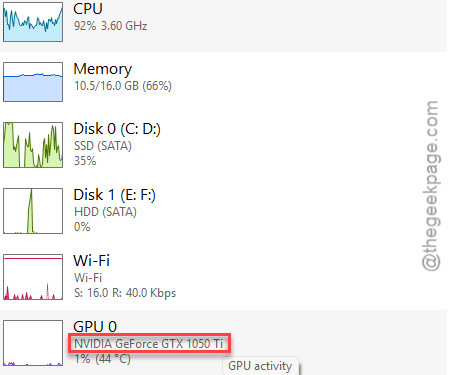
It should actually drop now when you load into a new sector.
Fix 5 – Drop Shadow Quality
Ultra shadow maps are memory hogs. Honestly, they’re the worst offender in a lot of big games.
Open Graphics Settings, change Shadow Quality from Ultra to High (or Medium on an 8 GB card), then restart the game.
Do not skip the restart. It clears out the shadow data that’s already loaded.
Fix 6 – Turn Off Launcher Overlays
Steam and the EA app both run overlays that track achievements and can record gameplay in the background. That can eat 1 to 2 GB of video memory. For an overlay. Ridiculous.
1 – Open Settings in your launcher (Steam or the EA app).
2 – Go to the In-Game overlay section.
3 – Uncheck the option that turns the overlay on.
4 – Restart the game.
Fix 7 – Run ISLC in the Background
Last one. Intelligent Standby List Cleaner (ISLC) is a small free tool that clears Windows’ standby memory, the cached leftovers Windows hangs on to even when nothing needs them. It won’t plug the VRAM leak by itself. But it smooths out the stutter when you jump between zones.
1 – Download ISLC from the official Wagnardsoft.
2 – Open the program.
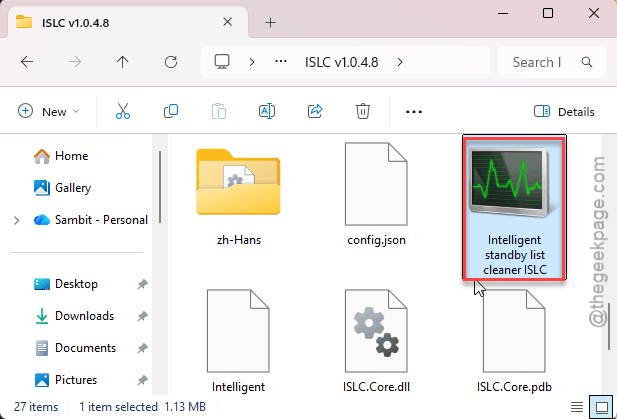
3 – Set The list size is at least to 1024 MB.
4 – Set Free memory is lower than to half your total RAM. With 16 GB of RAM, that’s 8192 MB.
5 – Click Start.
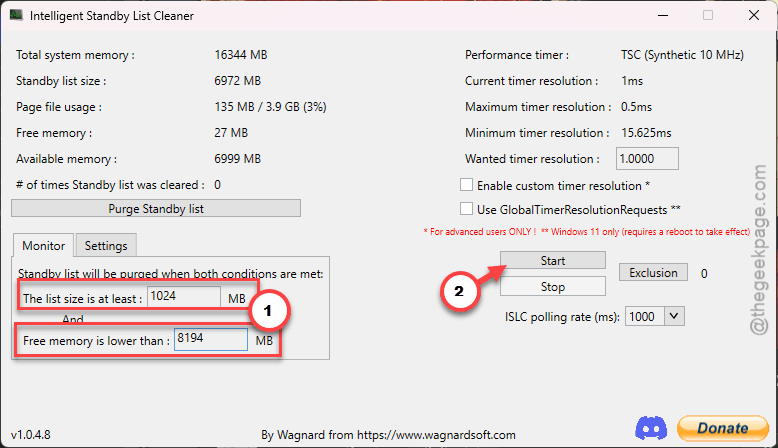
6 – Minimize it and leave it running while you play.
Keep It From Coming Back
- Update your graphics driver before any big release. Game-ready drivers exist for a reason.
- Keep Engine.ini set to read-only. Patches love resetting it.
- Ultra isn’t worth it on an 8 GB card. High textures and Medium shadows look nearly the same and leave room to breathe.
- Still seeing blur creep back after a couple of hours? Restart the game. Not elegant. But it holds until a patch lands.
People Also Ask
Why do Star Wars Zero Company textures go blurry after a while?
The game leaks video memory. It fills your graphics card’s VRAM and doesn’t clear old textures between zones, so once it’s full, the engine swaps in low-res versions to survive. Turning off Ray Reconstruction and raising the texture streaming pool in Engine.ini fixes it for most players.
Does Ray Reconstruction cause the Zero Company VRAM leak?
It’s one of the biggest causes, especially on 8 GB and 12 GB cards. Ray Reconstruction grabs memory the textures need. Turn it off in Graphics Settings under Upscaling & Ray Tracing. You can keep regular DLSS on, so the performance hit is usually small.