Many people using Windows 10 on their PC have started complaining that headphones are not working on their computer. Many a times this happened due to windows Update. If you are also among them, here are quick and simple fixes for this awkward problem. Before trying any of the fixes given, just restart your Computer while plugging in headphones in your computer.
Fix 1 – Plug the headphones and just restart
This is the simplest solution which has solved this issue to multiple users.
Just Plug your headphone into your computer and restart your computer
Fix 2 – Power Shutdown and try again
1 – Shutdown your computer. Remove the power plug.
2 – Remove the laptop battery.
(If the battery can’t be removed, Just press the power button for 30 seconds to remove any static charge.)
3 – Start the computer again and attach the headphone.
Fix 3 – Show Disabled devices
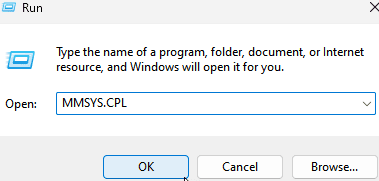
1 – Open run command box by jointly pressing Windows and R keys
2 – Tyep MMSYS.CPL in the text field and click OK

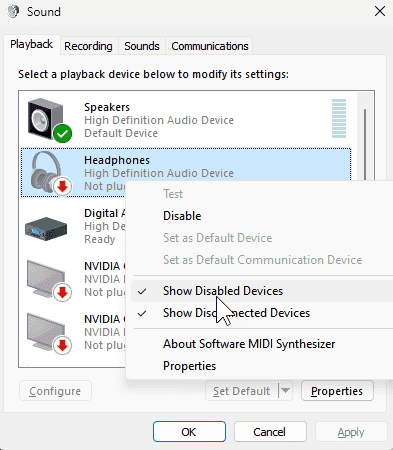
3 – Right click anywhere inside and make sure show disabled devices is selected. If not, Click on it to select it.

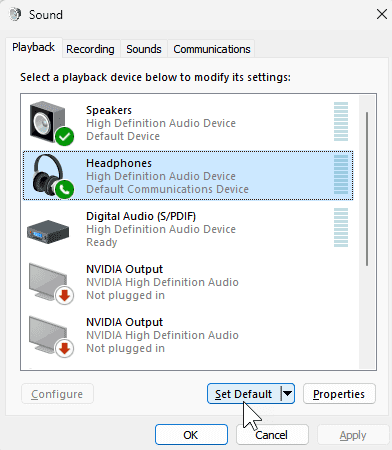
4 – Now, select Headphones and click on set default

Fix 4 – Update Your Audio driver
1. Search Device manager in windows 10 search.
2. Click on the search result to open Device manager.

3. Now, Click on Sound, Video & Game Controllers to expand it.
4. Right click on High Definition Audio Device and Click on Update Driver software
5. Choose Browse my computer for driver software6
6. Click on Next.
7. Select High definition audio device from the list and Click on Next to complete Update.

Try opening your Headphone again. Check if it is working or not.
Fix 5 – Disable Front Panel Jack Detection in Realtek Manager
1. Click on Sound manager to open it.

2. Click on the folder icon situated at top right side.
3. Uncheck Disable front panel jack detection option.
4. Click OK.

Now, check your headphones again.
Fix 6 – Set default Playback devices
1. Right click on sound icon in Taskbar and click on sounds.

2. Select speakers from the list.
3. Click on Set Default.

Fix 7 – Update Sound Blaster Z
1. Search Device manager in windows 10 search.
2. Click on the search result to open Device manager.

3. Now, Click on Sound, Video & Game Controllers to expand it.
4. Right Click on Sound Blaster Z and then click on update driver software
5. Select Browse my computer for driver software
6. Choose Let me pick from a list of device drivers on my computer
7. Select High Definition Audio Device
8. Click Next and update it.