Most of the windows users are aware of web cameras on their system and how to use it. But many are not knowing about network cameras and how it can be very useful. Network cameras captures the photo or video and compresses it and transmits over the network connected to Wi-Fi. Therefore the users can view/access the real time photo or video from anywhere the world, which is why CCTV camera gives us security surveillance for our house or premise. Whereas a web camera needs to be connected directly to our system but network cameras are can be placed anywhere on our premise provided it gets internet connection to transmit the data. But many people find it tough to add a network camera on their system. Therefore, in this post, we have come up with few easy steps on how to add a network camera on the Windows 11 system.
How to Add a Network Camera in Windows 11
Step 1: Open Settings app by pressing Windows + I keys together on your keyboard.
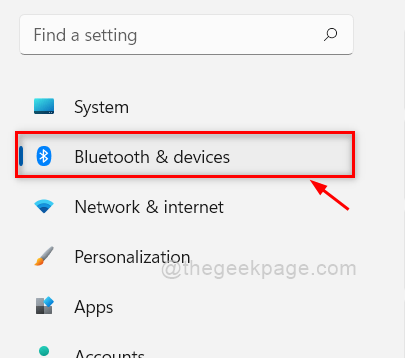
Step 2: Click Bluetooth & devices in the left side of the Settings window.

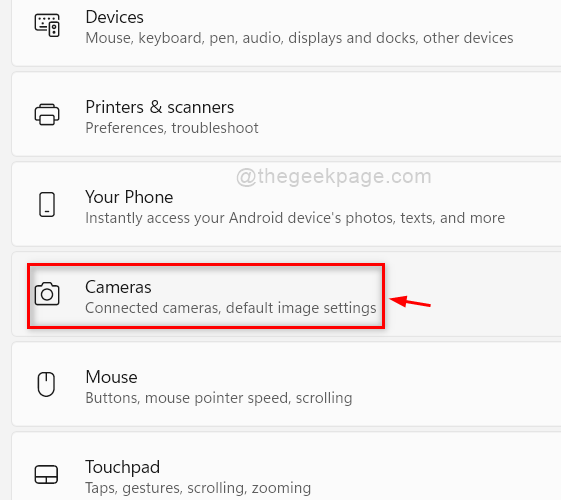
Step 3: Scroll down the Bluetooth & devices page on the right side and click Cameras option as shown in the below image.

Step 4: Then, Click Search for cameras button in the Add a network camera option on the Cameras page as shown below.

Step 5: It will start searching for any network cameras.
Step 6: If there are any network cameras around and got searched, then it will list under Add a network camera. Otherwise it will display No cameras found as shown below.

Step 7: If there is any network camera detected, then click on it and it will add that network camera on your system.
Step 8: Close the Settings app after adding the network camera.
That’s it folks.
Hope this post was informative and helpful.
Please leave us comments below.
Thank you for reading!