LogiLDA.dll is a dynamic link library file that runs behind the background of Windows 10 and searches for new updated drivers for the Logitech devices on your computer. Some users are reporting about facing a problem as they are consistently receiving an error message saying “There was a problem starting C:\Windows\System32\LogiLDA.dll. The specified module could not be found“. If you are receiving some kind of message on your computer, don’t worry. Just by following these easy fixes, you can fix your problem in no time. Before going ahead for the fixes, you should attempt these workarounds first and see if they are working or not.
Workarounds–
1. Unplug and then again plug in the device you are facing trouble with. Check if you are still facing the error message.
2. Reboot your computer and after rebooting check if you are still facing the error or not.
Fix-1 Disable the automatic startup of LogiLDA-
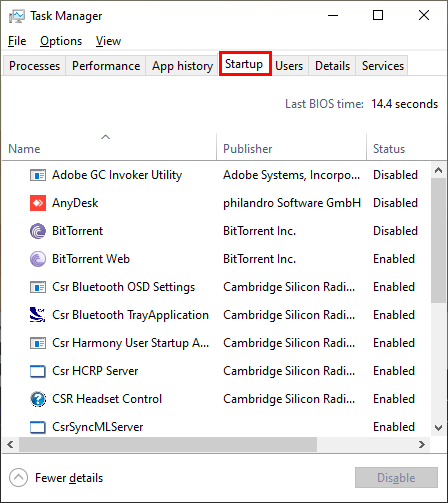
1. Press Ctrl+Shift+Enter to open the Task Manager window.
2. Now, go to the “Startup” tab.

3. Then scroll down to find “Logitech Download Assistant“.
4. Right-click on it and then click on “Disable“.

Now, close the Task Manager.
Reboot your computer and after rebooting you should not face the error again.
Fix-2 Delete Logitech Download Assistant key-
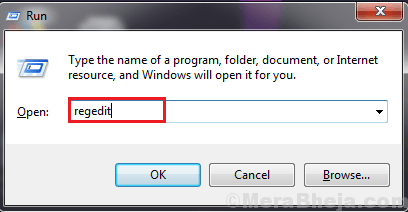
1. By pressing the Windows key along with the ‘R‘ key you can open the Run terminal.
2. Then, type “regedit” and then click on “OK“.

3. Now, navigate to this key in Registry Editor–
HKEY_LOCAL_MACHINE\Software\Microsoft\Windows\CurrentVersion\Run
Now, on the right pane find “Logitech Download Assistant” and right-click on it, and then click on “Delete“.
Close the Registry Editor.
Reboot your system.
LogiLDA.dll should not create further problems.
Fix-3 Uninstall Logitech Setpoint Software-
1. Press Windows key+R to open the Run window on your device.
2. Write this Run command in the Run window, click on “OK“.
appwiz.cpl

2. Now, in the list of the applications, find out “Logitech SetPoint” and double click on it to start the uninstallation process.
3. Complete the uninstallation process and after when the process is complete, reboot your computer.
Fix-4 Update the mouse driver-
1. Pressing the Windows key along with the ‘R‘ key will open the Run window.
2. In the Run window, type “devmgmt.msc” and then click on “OK“.

2. Now, click on the “Mice and other pointing devices“.
3. Right-click on the mouse device you are using currently. Now. Click on “Update driver“.

3. Then, click on the “Search automatically for updated for driver software“.

Wait till Windows searches for the compatible driver for your mouse, downloads it and installs it.
Reboot your computer.
You should not face any problem regarding LogiLDA.dll on your computer.
Fix-5 Uninstall and Reinstalling Mouse driver-
Follow these steps to uninstall your mouse driver.
1. Open a Run terminal by pressing the Windows key+R.
2. In the Run window, type or copy-paste this command and then click on “OK“.
devmgmt.msc

2. In the Device Manager utility window, look for the “Mice and other pointing devices“. Expand it by clicking on it.
3. After that, right-click on the mouse you are using, click on “Uninstall device“.

In the next steps, we will install the mouse driver again-
Method 1-
Restart your device and check if the driver is working or not.
Method 2–
If simply rebooting your computer didn’t install the driver, then follow these steps to install the driver manually-
1. After opening the Device Manager window, click on “Action“.
2. Again click on “Scan for hardware changes“.

2. This will find the uninstalled the driver and install the driver again.
Close Device Manager window.
The problem regarding LogiLDA.dll should be solved.