One of the most infamous BSOD (Blue Screen of Death) issues is associated with the “CRITICAL_PROCESS_DIED” stop code in Windows 11. If you are seeing this STOP CODE with your computer stocks on the blue screen, don’t worry. There are several reasons that can be behind this BSOD issue. In this article, we have shown some easy fixes to identify and fix the root cause of this problem.
Fix 1 – Rename the registry files
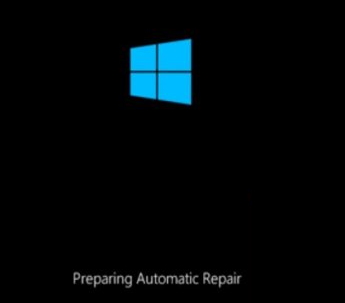
Note: – If you are unable to boot into your PC, then try going to automatic repair screen using the steps given below.
1. Turn off your PC.
2. Then, start your computer using power button once.
As soon as something appears on screen (Usually logo of your laptop manufacturer), just press and hold the power button for 5 seconds continuously to force shutdown your device.

3. Try repeating this process (Force shutdown and then starting again) for 2–3 times until you see Automatic repair screen.

4. Then, click on “Advanced options“ in the next screen.

5. After that, you need to click on “Troubleshoot“.

6. Then, click on the “Advanced options“.

7 – Then, click on “C0mmand Prompt“.

8 – just run this System File Checker scan to scan your system.
sfc /scannow

9 – Now, , type these commands one by one and execute them in the terminal .
Dism /Online /Cleanup-Image /CheckHealth
Dism /Online /Cleanup-Image /ScanHealth
Dism /Online /Cleanup-Image /RestoreHealth

Wait for a while to finish the process.
10 – Now, write this command and then hit Enter to run a disk checking operation.
chkdsk C: /f

Once the verification is done, just close the Command Prompt terminal and restart your computer.
Note: – If this does not work, Just repeat the process until step 6 and then choose uninstall updates to uninstall any recent updates which may have cause this issue.

Fix 2 – Rename the registry files
You can try renaming the registry files on your computer.
1. Open the Windows Recovery Environment screen.
2. Then, click on the “Advanced options” to access it.

3. Then, click on “Troubleshoot” to go to the next step.

4. After that, click on the “Advanced options” to proceed further.

5. After that, click on “C0mmand Prompt“.

6. Then, select your administrative account on the next page.

7. Further, type the account password in the box and click on “Continue“.

8. This will open the Command Prompt.
9. Now, navigate to the config folder.
cd C:\windows\system32\config

10. Now, type these two commands one by one and hit Enter to create a system and software backup.
Ren system system_backup
Ren Software Software_backup

11. Once you have created the backup, just execute these two commands to copy the registry hive to the config folder.
Copy C:\Windows\system32\config\regback\software C:\windows\system32\config\software
Copy C:\Windows\system32\config\regback\system C:\windows\system32\config\system

After running these commands, close the Command Prompt.
12. Further, click on “Continue” to boot your computer normally.

This should fix the issue you are facing.
Fix 3 – Uninstall the latest Windows Updates
If you are facing this issue after you have updated your device, you can just uninstall the latest Windows Updates from your computer.
1. Press the Windows key+R keys together to open the Run window.
2. Then, type “appwiz.cpl” and click on “OK“.

3. When the Programs & Features window opens, tap on the “View installed updates” on the left-hand side.

4. Now, you will see the list of installed updates with names, dates, etc.
5. Carefully note which update was installed recently. Just, right-click on the last update your computer has received and click on “Uninstall“.

Now, your computer will uninstall the update patch from your computer. Your computer will be restarted to complete the process.
Check the status of the issue after this.
Fix 4 – Scan the hard disk
‘Critical Process Died’ BSOD error may come up if there is an issue with your hard disk.
1. At first, press the Windows key and type “cmd“.
2. Then, right-click on the “Command Prompt” and tap on “Run as administrator” to open the Command Prompt as an administrator.

3. Now, write this command and then hit Enter to run a disk checking operation.
chkdsk C: /f

This will run a disk checking operation on the hard drive. In this process, if it detects any faults in the process, it will repair it.
Once the test is done, just close the Command Prompt terminal and restart your computer.
Fix 5 – Run SFC and DISM scans
There are SFC and DISM tools that can check system files for corruption or absence and fix it during the scanning process.
1. You can easily open the Run terminal by pressing Windows key+R.
2. In the Run window, type “cmd” and then press Ctrl+Shift+Enter keys together.

2. At first, type this command in the terminal and hit Enter.
DISM.exe /Online /Cleanup-image /Restorehealth

Wait for a while to finish the process.
3. Once the DISM scan is complete, just run this System File Checker scan to scan your system.
sfc /scannow

Once the verification is done, just close the Command Prompt terminal and restart your computer.