Some users have complained about seeing an annoying error message while they are trying to execute any run commands from Command Prompt. If you are facing this issue on your device, there is nothing to worry about. This solution to this issue is very simple. Just follow our prescribed fix on your system and the problem will be solved in a while.

Fix – 1 Run the CMD as an administrator
You need administrative permissions to run most of the administrative commands.
1. Write “cmd” in the search box.
2. After that, right-click on “Command Prompt” and choose “Run as administrator“.

3. Type the command you were trying to execute and hit Enter.
Check if you are still seeing the same error on your computer or not.
Fix 2 – Run SFC scan to fix the registry corruption
Sometimes the registry corruption can cause this issue.
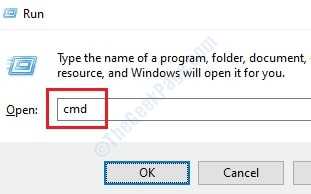
1. Press the Windows key+R.
2. Then, type this code and hit CTRL + Shift + Enter.
cmd

3. Simply copy this command and paste it into the CMD window. Thereafter, hit Enter to run the scan.
sfc /scannow

4. To launch a DISM scan, paste this command in the terminal and then hit Enter.
DISM.exe /Online /Cleanup-image /Restorehealth

Once all these checks are complete, close the terminal and restart your device.
Fix 3 – Run chkdsk
Corruption in the C: drive can cause this issue.
1. Type “cmd” in the search box.
2. Then, right-click on “Command Prompt” and choose “Run as administrator“.

Command Prompt with administrative rights will be opened.
3. When the terminal opens up, paste this code, modify it, and hit Enter.
chkdsk /f drive letter:
[You have to replace the drive letter: with the drive letter where Windows is installed on your computer.
Example– It is the C: drive for our system. For us, the command will look like this-
chkdsk /f C:
]
4. You have to press the “Y” key and hit Enter if there is a question ‘Would you like to schedule this volume to be checked the next time the system restarts? (Y/N)’.

After that, close the CMD screen on your system and reboot your computer.
Fix 4 – Convert current account to administrator
Try converting the current account to an administrative account.
1. Press the Windows key and type “Control Panel”
2. After that, click on “Control Panel”.

3. Here, you need to click on ‘View by:’ and then choose “Category“.
4. After that, click on “Change account type” under ‘User Accounts‘ in order to modify the account type.

5. Now, click on your account to modify your account.

6. After that, on the left-hand side, click on the “Change the account type“.

7. Click on the radio-button beside, “Administrator” to set this account as an administrator of this computer.
8. After doing these, click on the “Change Account Type” to save this change.

Close Control Panel window.
Try to run the command from this administrative account.
Fix 5 – Take ownership of the partition
If other fixes don’t work out for you, try taking ownership of the partition.
NOTE – Please be careful while taking ownership of the partition. Taking ownership of the system drive may cause further issues.
1. Open the File Explorer.
2. Right-click on the drive and then click on “Properties“.

3. Click on the “Security” tab.
4. In the Security tab, click on the “Advanced“.

5. Now, click on “Change“.

6. Click on “Advanced“.

7. Now, click on “Find Now“.
8. Then scroll down through the list of groups or users, select your user name. (For this computer it is “Sambit“.)
9. Click on “OK“.

10. Again click on “OK“.

11. Then, click on “Add“.

12. Now, click on “Select a principal“.

13. Click on “Advanced“.

14. Now, click on “Find Now“.
15. Then scroll down through the list of groups or users, select your user name. (For this computer it is “Sambit“.)
16. Click on “OK“.

17. Again click on “OK“.

18. Now, select the “Full control” check box.
19. Then, click on “OK“.

20. Finally, click on “Apply” and then on “OK“.

21. In the Security tab, click on “Apply” and then on “OK“.

Now you have the proper permission to run the operation. Your problem is solved.