Some Windows 10 users are complaining about a missing dll file problem in the forum. According to them, when they are trying to start a variable set of applications on their computers, an error message is shown to them stating “MSVCP100.dll was not found. Reinstalling the program may fix this problem.” If you are in the same situation and can’t decide what to do, simply follow these fixes on your computer and the problem will be solved pretty easily.
This problem usually happens due to corruption in Microsoft VC++ installed on your computer. Uninstalling and re-installing the package will solve this issue.
Fix 1 – Download MSVCP100.dll
1. Go to https://www.dll-files.com/msvcp100.dll.html
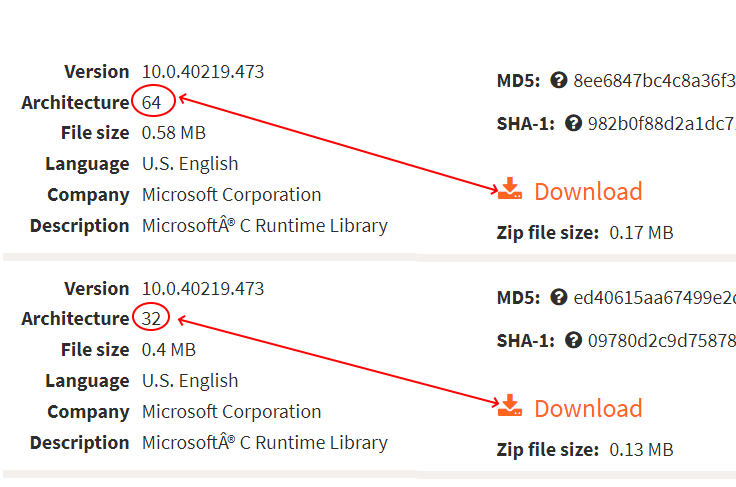
2. Now, Based on whether your PC is 64 bit or 32 bit architecture , download MSVCP100.DLL

3. Now, extract the downloaded file.
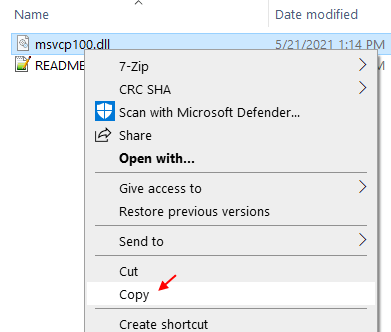
4. Copy MSVCP100.DLL from the extracted folder.

5. Now, If your PC is 64 bit PC, then paste it in
C:\Windows\SysWOW64
If your PC is 32 bit PC, paste it in
C:\Windows\System32
Note: – To know whether your PC is 64 bit or 32 bit read this article.
6. Restart your computer.
Problem solved
Fix 2 – Remove and re-install Microsoft VC++ 2010 Packages-
Removing and re-installing Microsoft Visual C++ 2010 redistributable package will solve this issue on your computer.
Case 1 – For Windows 10
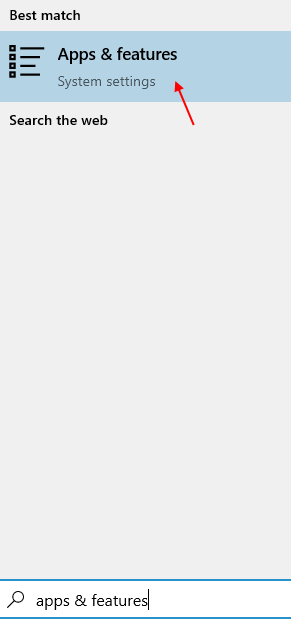
1. Search Apps & Features in Windows 10 search box.
2. Now, Click on Apps & Features.

3. Now, search C++ in the search box.
4. Click on Microsoft Visual C++ Redistributable from the list.

Case 2 -For Windows 11
1 – Press Windows key + I to open settings.
2 – Now, Click on Apps from the left menu.
3 – Now, Click on Installed apps from the right menu.
4 – Now, search C++ from the search box.
5- Click on 3 vertical dots and click on Uninstall to uninstall all redistributable from your PC.

6. After that, Go to latest supported Visual C++ downloads and then click on “Download“.
7. Download vcredist_x64.exe for 64 bit PC and vcredist_x86.exe for 32 bit PC.
8. Now, go to the downloaded location on your computer.
9. Double click on downloaded file to start the installation process.
10. Now, follow the on-screen instructions and complete the installation.
11. Click on “Finish” to finish the installation process.
Restart your computer to finish the installation process.
After rebooting your computer, try to run the problematic application again on your computer.
You will not notice the dll error further. Your problem should be solved.